When Should Engine Coolant Be Changed?
It’s easy to forget about your engine coolant—until overheating, corrosion, or costly repairs make it impossible to ignore. But when should engine coolant be changed to avoid trouble? The answer isn’t as simple as a date on the calendar. In this guide, we’ll reveal the warning signs, timing factors, and maintenance tips most drivers overlook until it’s too late.
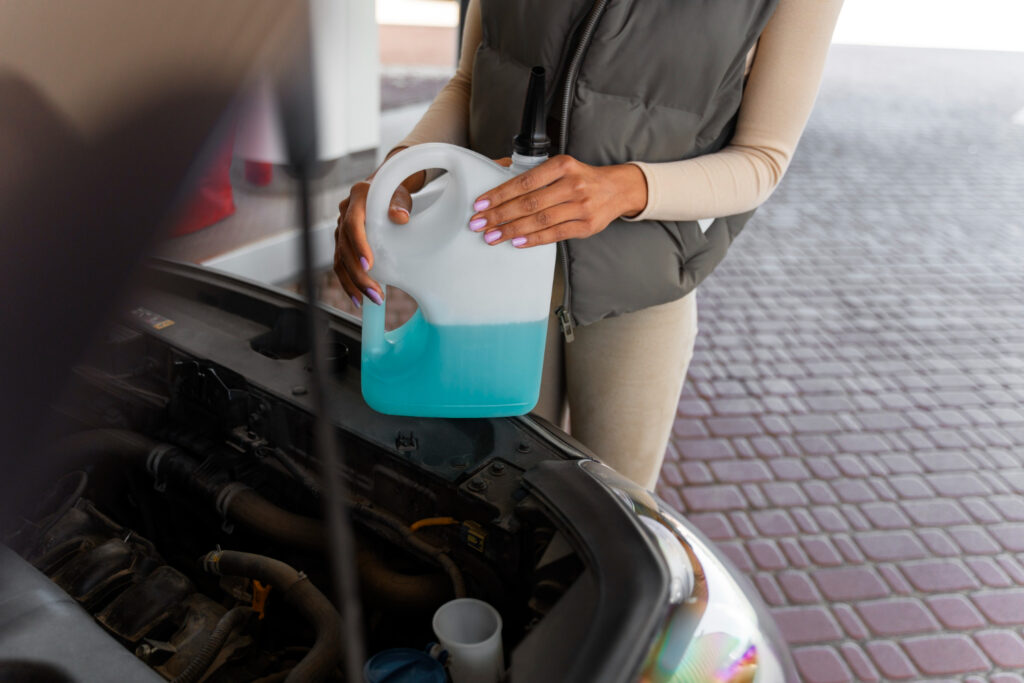
Is your coolant low? Book radiator repair in Brooklyn today!
TL;DR:
Engine coolant degrades over time, losing its ability to transfer heat, prevent corrosion, and maintain freeze/boil protection. Follow manufacturer-recommended intervals, inspect its color and condition, and watch for overheating or temperature fluctuations. Even “long-life” coolants require periodic checks. Replace it after major cooling system repairs to remove contaminants and restore protection. Regular maintenance prevents costly engine damage and ensures optimal cooling performance.
How Can You Tell When It’s Time to Change Engine Coolant?
Your engine’s coolant—a blend of antifreeze and water—does much more than prevent freezing in winter or boiling in summer. It also transfers heat, protects against corrosion, and safeguards seals and aluminum components. Over time, the chemical additives that provide corrosion resistance and pH balance break down, while contamination can accumulate in the system.
When this happens, its ability to regulate temperature, prevent rust, and maintain proper freeze/boil protection declines. That’s why it should be treated as a scheduled maintenance item, not just topped off when low. Even if your vehicle uses a modern long-life formulation, “long-life” does not mean permanent—both the coolant’s condition and the manufacturer’s recommended mileage or time intervals should be monitored closely.
1. Check the Manufacturer’s Recommendations for Coolant Replacement
The best place to start when planning maintenance is your vehicle’s owner’s manual and any relevant manufacturer service bulletins. Coolant formulas and replacement intervals are designed with your engine’s materials, operating temperatures, and performance needs in mind. Many manufacturers list specific timelines or mileage intervals—sometimes just a few years, and in the case of some long-life coolants, up to 100,000 miles.
Following these guidelines helps you avoid potential warranty issues and prevents the risks that come with mixing incompatible types. If your exact recommendation isn’t readily available, use “inspect regularly and replace if degraded” as a fallback approach, and confirm the correct specification with an authorized dealer or a trusted repair shop.
2. Monitor the Coolant’s Color and Condition
Checking its appearance is a quick way to spot early signs of trouble. While color alone isn’t a perfect indicator, changes in clarity, consistency, or odor can reveal contamination, additive breakdown, or other issues that require attention.
- Fresh appearance – Bright and relatively clear (green, orange, pink, blue, etc., depending on formulation).
- Signs of contamination – Dark, cloudy, rusty, or brown sludge may indicate rust, oil, or additive depletion.
- Cross-contamination – Floating sludge, milky emulsion, or oily film often means oil in the it (e.g., head gasket issues) and needs immediate inspection.
- Odor and pH – Sour or acidic smell, or low pH on a test strip, suggests additive breakdown and higher corrosion risk.
- Color considerations – Color mainly identifies the type, not health; changes in color can signal contamination or additive wear and should prompt testing.
3. Look for Signs of Overheating or Engine Temperature Issues
Paying attention to changes in your vehicle’s temperature behavior can help you catch cooling system problems early. If the engine runs hotter than normal, the thermostat cycles irregularly, the temperature gauge shows sudden spikes, or the cabin heater loses efficiency, it could mean the coolant or another cooling system component is failing.
Overheating may result from several causes, including low liquid levels, clogged passages from degraded coolant or rust, a failing water pump, thermostat malfunctions, or poor heat transfer due to old or contaminated coolant. Recurrent or unexplained temperature fluctuations are a clear sign that the cooling system needs a thorough inspection—this should include a pressure test, thermostat check, radiator and hose evaluation, and coolant analysis.
Addressing overheating promptly is critical. Persistent high temperatures not only degrade the liquid faster but also accelerate corrosion of metal components, increasing the risk of costly engine damage.
4. Consider the Age of Your Vehicle and Coolant
When it comes to coolant health, time can be just as important as mileage. The additives that protect against corrosion and maintain proper pH gradually degrade, even if your vehicle hasn’t been driven much. Older types, such as inorganic additive technology (IAT), typically require replacement every 2 years or 30,000–60,000 miles. Newer organic acid technology (OAT) and hybrid formulas can last much longer—often 5 years or 100,000 miles or more.
Nevertheless, extended service intervals don’t mean it is immune to aging. Over time, it can still become acidic or lose protective qualities, especially in modern engines made from mixed metals like aluminum, iron, and brass. These changes increase the risk of corrosion and reduce cooling efficiency.
Because coolant chemistry and engine materials vary, it’s best not to assume that “long-life” means “never change.” Periodic inspection or testing every 1–3 years, depending on use and conditions, is a smart way to ensure continued protection.
5. Replace Coolant After Repairing the Cooling System
Whenever the cooling system is opened for repairs—such as radiator replacement, head gasket work, water pump or hose replacement, or fixing a major leak—it’s important to replace and properly refill the coolant. Opening the system can introduce contaminants like solder particles, metal shavings, or remnants of old fluid, which can compromise corrosion protection and heat transfer efficiency.
Refilling with the correct coolant type and concentration restores the system’s protective and thermal properties. In many cases, a complete system flush is recommended after major repairs or when contamination is suspected, ensuring all old or compromised fluid is removed.
After refilling, follow the manufacturer’s bleed procedure to remove any trapped air pockets, which can disrupt circulation and cause overheating. Once the vehicle has been driven for a short break-in period, recheck the coolant level and condition to confirm proper system operation.
Key Takeaways
- Coolant’s Role & Maintenance Need – Engine coolant not only prevents freezing and boiling but also transfers heat, protects against corrosion, and safeguards engine components. Over time, additives degrade, contamination builds, and performance declines, making regular replacement essential.
- Follow Manufacturer Guidelines – Always check the owner’s manual or service bulletins for replacement intervals and specifications to avoid warranty issues and prevent mixing incompatible coolants.
- Inspect Color & Condition – Fresh coolant is bright and clear; discoloration, cloudiness, sludge, or abnormal odor indicates contamination, additive breakdown, or cross-contamination requiring attention.
- Watch for Overheating Signs – Temperature spikes, irregular thermostat cycling, heater issues, or persistent overheating signal, possible coolant or system component failure, demanding prompt inspection.
- Account for Age & Formulation – Additives degrade over time even with low mileage. IAT coolants need replacement every ~2 years, while OAT and hybrid types can last 5+ years, but periodic testing is still necessary.
- Replace After System Repairs – Any major cooling system repair warrants replacing and properly refilling coolant—often with a full flush—to restore protection, remove contaminants, and ensure proper circulation.
Reviewed by Carlos Jimenez – Mechanic