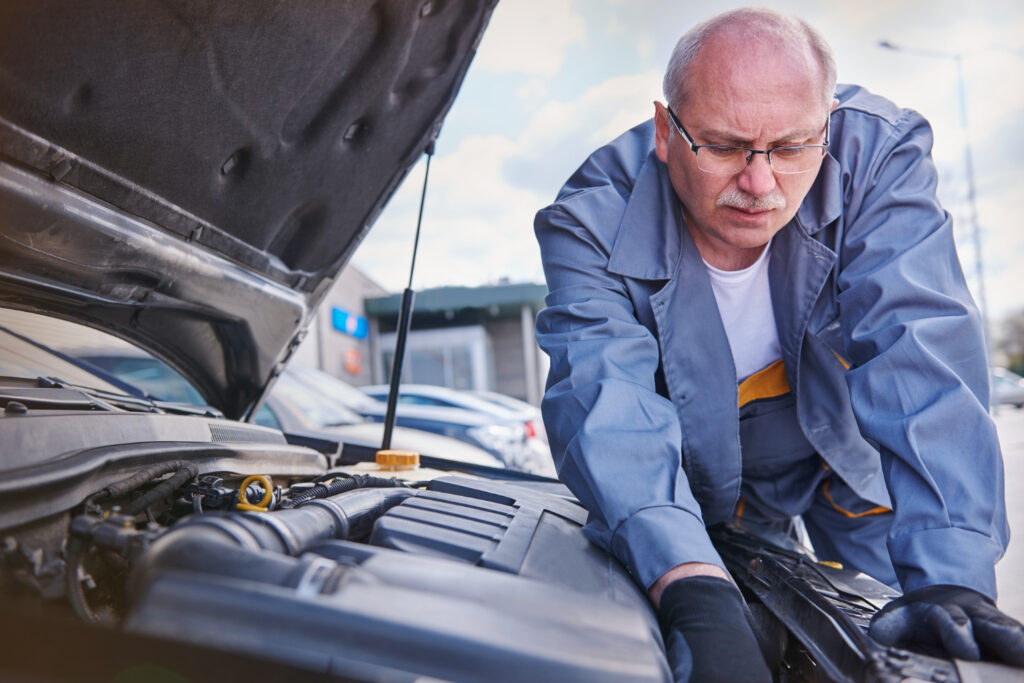
When Should the Engine Cooling System Iron Be Used
Most drivers only think about their cooling system when something goes wrong, but what if there’s a tool that can help prevent serious issues before they start? If you’ve ever wondered when should the engine cooling system iron be used, the answer isn’t as obvious as it seems. Using it at the wrong time or not at all, could lead to costly problems.
Book radiator repair in Brooklyn today.
TL;DR:
An engine cooling system iron is a specialized maintenance tool used to safely service cooling system components like hoses and radiators. It helps loosen stuck parts, support repairs, and improve efficiency while reducing damage risk. Proper use, following safe steps and precautions is essential to maintain performance, prevent overheating, and ensure reliable engine operation.

What is an Engine Cooling System Iron used for?
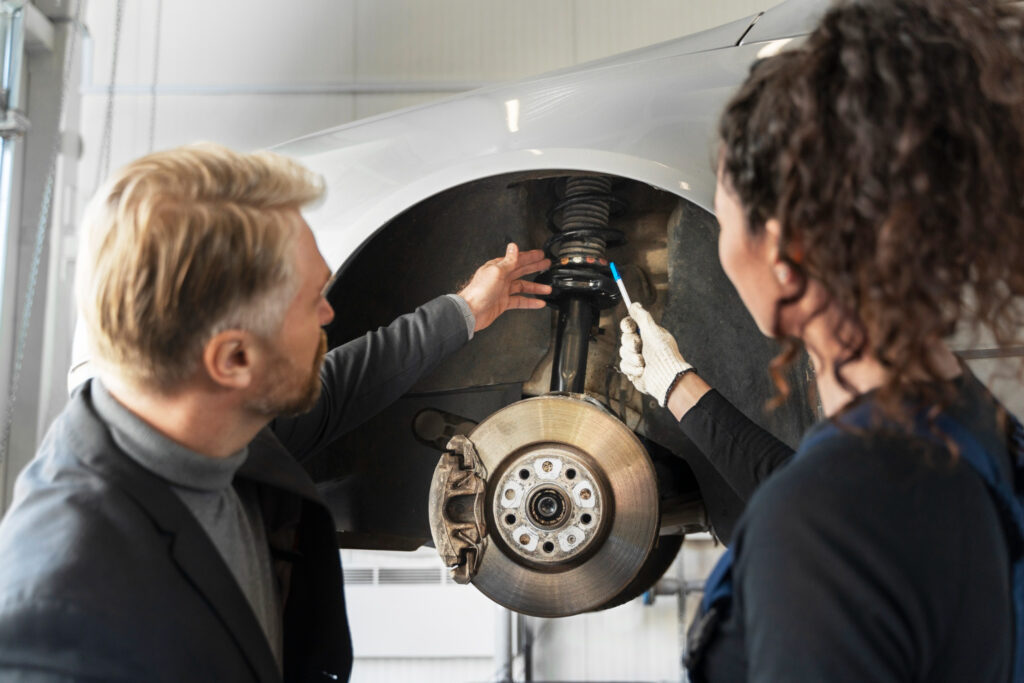
An engine cooling system iron is a specialized tool used during the maintenance and repair of a vehicle’s cooling system. It is not a component of the engine itself, but rather a support tool that helps technicians safely work on parts such as hoses, radiators, and coolant passages. Since it operates under high temperatures, this tool is useful for handling components affected by heat, corrosion, or long-term wear.
In practical applications, this tool is commonly used to loosen hardened hoses or seals, assist in flushing procedures, and support the removal or installation of heat-exposed components. Over time, parts in the cooling structure can become stuck due to thermal expansion or corrosion, and using a specialized tool helps reduce the risk of damage during service.
Purpose of an Engine Cooling System Iron
The main purpose of this tool is to support safe and effective maintenance, which is essential for proper engine performance. The structure itself regulates temperature, prevents overheating, and maintains efficient operation.
Within this context, the tool helps to:
- Improve access to heat-exposed components
- Reduce the risk of damage during disassembly
- Support proper cleaning and flushing procedures
By assisting in maintenance tasks, it contributes to better thermal regulation and overall engine reliability.
When to Use an Engine Cooling System Iron
This tool is typically used during maintenance or repair situations where cooling system components are affected by heat and pressure. Over time, these conditions can cause parts to become difficult to remove or service, making specialized tools necessary for safe handling.
In practical applications, it is commonly used for tasks such as removing old or hardened radiator hoses, performing coolant flushes or system cleaning, repairing leaks, and replacing seals. It is also helpful for loosening parts that have become stuck due to corrosion or thermal expansion.
Because these components can become tightly sealed over time, using this tool helps avoid excessive force, reducing the risk of damaging parts during maintenance or repair.
Steps to Use an Engine Cooling System Iron
Using this structure requires a careful and methodical approach to ensure both safety and effectiveness. Since it operates under heat and pressure, proper preparation is essential before handling any components. Following a structured process helps prevent damage, ensures accurate repairs, and maintains the overall efficiency of the structure after service.
- Prepare the vehicle – Ensure the engine is completely cool
- Drain the cooling system – Remove coolant safely
- Identify the component – Locate the part to be serviced
- Apply the tool – Use controlled heat or pressure to loosen components
- Perform maintenance – Repair, replace, or clean as needed
- Reassemble and refill – Reinstall parts and refill coolant
- Test the system – Verify proper operation and temperature control
Benefits of Using the Tool
This offers several practical advantages during maintenance and repair procedures. Because cooling system components are often exposed to extreme heat and long-term wear, they can become difficult to remove or service without proper tools. This tool helps make the process more controlled, reducing the likelihood of errors and improving the overall quality of the repair.
- Helps prevent component damage during removal
- Improves efficiency by reducing effort and time
- Enhances safety by limiting excessive force
- Supports proper repairs and reliability
- Contributes to longer engine life by maintaining the cooling system
Safety Tips for Proper Use
Working with it requires careful attention due to the presence of heat, pressure, and chemical fluids. It is important to always ensure the engine is completely cool before beginning any work, as residual heat and pressure can cause serious burns if it is opened too soon.
Protective gear such as gloves and eye protection should be used when handling tools and coolant, since these fluids may contain chemicals that can be hazardous. If the tool involves applying heat, it should be used carefully to avoid overheating nearby components or causing unintended damage. Additionally, following proper usage guidelines and working in a well-ventilated area helps ensure both safety and effective maintenance.
Key Takeaways.
- An engine cooling system iron is a specialized maintenance tool.
It is used to safely service cooling structure components like hoses and radiators. It helps handle parts affected by heat, corrosion, and long-term wear. - The tool supports effective cooling system maintenance.
It improves access to components, reduces damage during disassembly, and aids cleaning. This contributes to proper temperature regulation and overall engine reliability. - It is used in specific repair and maintenance situations.
Common uses include removing hardened hoses, performing coolant flushes, and fixing leaks. It is especially helpful when components are stuck due to heat or corrosion. - Proper use requires a structured and careful process.
Steps include cooling the engine, draining coolant, applying the tool, and testing the system. This ensures safe handling and maintains efficiency after repairs. - The tool improves efficiency, safety, and system longevity.
It reduces effort, prevents damage, and supports reliable repairs. Following safety precautions, such as using protective gear and avoiding hot systems, is essential.
FAQs:
When should the engine cooling system iron be used?
It should be used during maintenance or repairs, especially when removing hardened hoses, performing coolant flushes, or dealing with components stuck due to heat or corrosion.
What is the engine cooling system?
It is a structure that regulates engine temperature by circulating coolant to absorb heat and release it through the radiator, preventing overheating.
What is an engine cooling system iron?
It is a specialized tool used to assist in servicing cooling system components, helping loosen, remove, or install parts exposed to heat and wear.
How to use an engine cooling system iron?
To use it properly, first ensure the engine is completely cool, then drain the coolant and identify the component to service. Apply the tool carefully to loosen or handle parts, perform the repair or cleaning, and finally reassemble, refill the system, and test for proper operation.
You May Also Like:
How Engine Cooling System Works to Prevent Overheating
Why Is My Engine Cooling System Light On? Causes & Fixes
How Much Does Engine Cooling System Repair Cost?
What Is Engine Cooling System in Car and How It Works
Your engine generates intense heat every time you drive, but what keeps it from overheating and failing? Most drivers rarely think about it until warning lights appear or steam rises from under the hood. If you’ve ever wondered what is engine cooling system in car, comprehending how it works reveals the hidden process that protects your engine and keeps your vehicle running smoothly.
Fast radiator repair in Brooklyn available
TL;DR:
A car engine cooling system uses a closed loop of coolant circulation to remove excess high temperature and keep the motor at a safe temperature. It absorbs heat from the engine, releases it in the radiator with the help of airflow, and is continuously circulated by the water pump, while the thermostat regulates flow to maintain stable and efficient operation.
How does a Car Engine Cooling System work?
A car engine cooling system is designed to remove excess heat generated during combustion and keep the motor operating within a safe temperature range. Since internal combustion engines produce significant heat, the system uses a closed loop of liquid coolant circulation to regulate temperature.
The coolant absorbs heat from the motor, carries it to the radiator where it is cooled, and then recirculates to repeat the process. This continuous cycle is supported by essential components such as the radiator, water pump, thermostat, hoses, and cooling fan.
Coolant Curates Through the Engine to Absorb Heat
The cooling process begins with refrigerant flowing through internal passages called water jackets, located within the engine block and cylinder head. These channels surround the hottest components, allowing the coolant to directly absorb heat produced during combustion.
Functions of refrigerant at this stage include:
- Absorbing high temperature from motor metal surfaces
- Preventing localized overheating in critical areas
- Maintaining stable internal temperatures
It is typically a mixture of water and antifreeze, designed to increase boiling point, resist freezing, and reduce corrosion, making it more effective than plain water for long-term use.
Heated Coolant Moves to the Radiator for Temperature Reduction
After absorbing heat, the coolant is directed toward the radiator, where the cooling process continues. The radiator acts as a heat exchanger that prepares the hot coolant to release the high temperature it has collected.
Inside the radiator:
| Feature | Function |
| Thin tubes | Carry hot refrigerant through the system |
| Increased surface area | Allows faster heat transfer |
| Flow design | Ensures even distribution of refrigerant |
This structure allows the coolant to spread out and release heat efficiently before returning to the motor.
Airflow Across the Radiator Dissipates Heat from the Coolant
The radiator relies on airflow to remove heat from the coolant. As air passes across the radiator fins, it draws high temperature away from the refrigerant through a process of convection.
This cooling process depends on:
- Vehicle movement, which naturally pushes air through the radiator
- Cooling fans, which maintain airflow when the vehicle is stationary or moving slowly
- Radiator fin design, which increases heat dissipation efficiency
Consistent airflow ensures that the refrigerant is cooled effectively before it cycles back into the engine.
Water Pump Maintains Continuous Coolant Movement
The water pump is responsible for keeping coolant moving through the entire system. It creates the pressure needed to push refrigerant through hoses, engine passages, and the radiator, ensuring a continuous cooling cycle.
Its main roles include:
- Circulating coolant from the radiator back into the motor
- Maintaining steady flow to prevent heat buildup
- Supporting consistent high temperature transfer throughout the system
Without this continuous movement, the cooling system would not be able to regulate engine temperature effectively.
Thermostat Regulates Coolant Flow Based on Engine Temperature
The thermostat functions as a temperature-controlled valve that manages when coolant flows to the radiator. When the engine is cold, the thermostat remains closed, allowing refrigerant to circulate only within the motor. This helps reach its optimal operating temperature more quickly.
As the motor warms up, the thermostat gradually opens, allowing refrigerant to flow into the radiator for cooling. This controlled regulation ensures the motor does not overheat or run too cold. Modern thermostats often use materials that respond to high temperature changes, automatically adjusting the flow of refrigerant based on temperature conditions.
Key Takeaways.
- The engine cooling system prevents overheating and maintains safe operation.
It removes excess high temperature generated during combustion and keeps the motor within an optimal temperature range. This process is essential for engine performance, durability, and safe vehicle operation. - Cooling works through a continuous coolant circulation cycle.
Coolant absorbs heat from the motor, moves to the radiator to release it, and then recirculates. Essential components like the radiator, water pump, and thermostat support this closed-loop system. - Coolant absorbs heat and protects engine components.
Flowing through water jackets, it removes heat from critical areas. Its chemical composition helps prevent freezing, boiling, and corrosion. - The radiator and airflow remove heat from the coolant.
The radiator’s design increases surface area for efficient heat transfer. Airflow from movement or fans helps dissipate heat and cool the liquid. - The water pump and thermostat regulate flow and temperature.
The water pump ensures constant coolant circulation throughout the system. The thermostat controls when refrigerant flows to the radiator, maintaining stable temperature.
FAQs:
What does engine cooling system mean?
An engine cooling system is a system that removes excess high temperature from the motor using circulating coolant. It helps maintain a safe operating temperature and prevents overheating.
Why does my car keep overheating?
Overheating can occur when the cooling system is not properly removing heat. This may happen if coolant is not circulating effectively or if heat is not being dissipated through the radiator.
Is an engine cooling system important or serious?
Yes, it is essential. The cooling system removes excess heat and keeps the motor within a safe temperature range, preventing overheating, component damage, and loss of performance.
How do I know if the engine cooling system is working?
It is working properly if it maintains a stable engine temperature without overheating. The refrigerant should circulate continuously, and the radiator, water pump, and thermostat should regulate heat effectively.
You May Also Like:
How Engine Cooling System Works to Prevent Overheating
Why Is My Engine Cooling System Light On? Causes & Fixes
How Much Does Engine Cooling System Repair Cost?
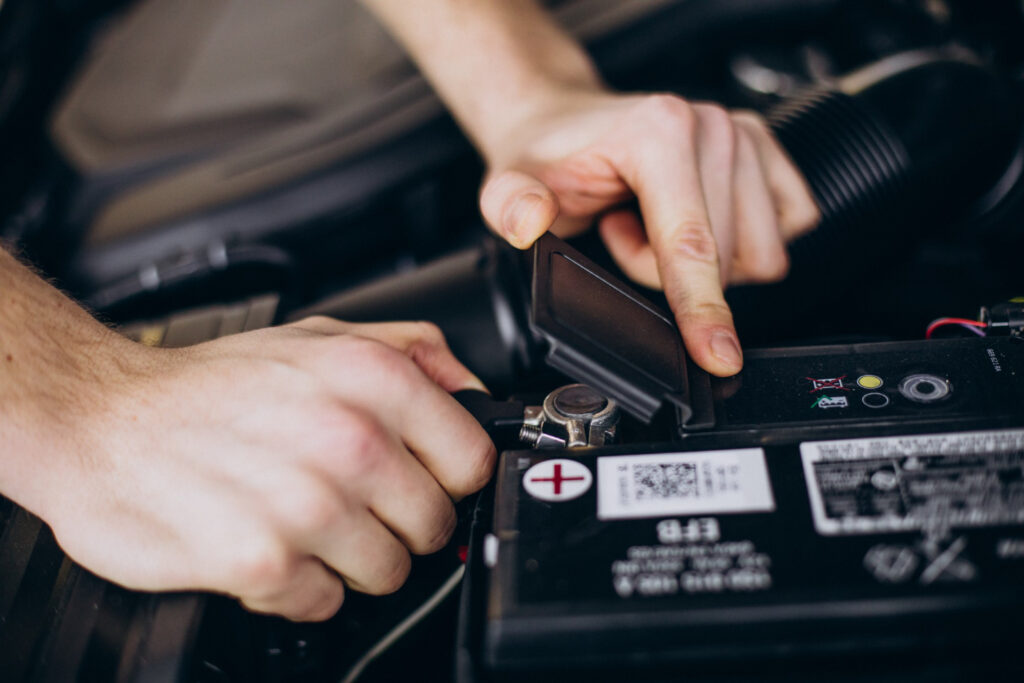
How Long Can a Brand New Car Battery Sit Unused Before Issues?
You just bought a brand-new car battery, but what happens if it sits unused for weeks, or even months? Many drivers assume a new battery will stay ready indefinitely, but that’s not always the case. If you’ve been wondering how long can a brand new car battery sit unused?, the answer depends on factors most people overlook, and they can impact performance sooner than expected.
Safe replacement from car battery replacement in Brooklyn.
TL;DR:
A new car battery can degrade even when unused due to self-discharge and calendar aging, losing charge within weeks and potentially suffering damage after months. Factors like temperature, storage conditions, and charge level affect how quickly it deteriorates. Proper storage, periodic checks, and testing before use are essential to maintain performance and prevent early failure.

What Happens if a New Car Battery Sits Unused Too Long?
When a new car battery sits unused for an extended period, it does not remain in the same condition. Instead, it begins to degrade through calendar aging, a process where internal chemical reactions gradually reduce its ability to hold and deliver charge.
Even without being connected to a vehicle, batteries naturally self-discharge, meaning they lose stored energy over time. In many cases, noticeable charge loss can occur within a few weeks, and the battery may become partially or fully discharged after a couple of months.
Prolonged inactivity can also lead to deeper internal changes, such as increased internal resistance, reduced capacity, and potential irreversible damage if the voltage drops too low. Research shows that even without active use, storage alone can cause permanent capacity loss and reduced efficiency. These changes can make it less reliable when it is finally used.
Recognizing How Batteries Lose Charge Over Time
All batteries experience self-discharge, driven by internal chemical reactions that continue even when the battery is disconnected. Over time, this leads to a gradual loss of stored energy and reduced performance.
Main points include:
- Charge can drop noticeably within 4–6 weeks depending on conditions
- Internal reactions continue regardless of usage
- Low voltage levels can lead to permanent damage
- Longer storage increases internal resistance, reducing power delivery
These effects are linked to ongoing electrochemical reactions that slowly consume active materials inside it.
Observing Effects of Temperature and Storage Conditions
Temperature and storage conditions play a major role in how quickly a battery degrades. Improper conditions can significantly accelerate the aging process.
Important factors include:
- High temperatures increase chemical activity and speed up degradation
- Very low temperatures can reduce performance and stability
- Ideal storage is in cool, moderate conditions (~15°C)
- Batteries stored at very high or very low charge levels degrade faster
Research shows that heat combined with high charge levels can accelerate aging, making proper storage essential.
Identifying Signs of Battery Deterioration
A battery that has been unused for too long may show several warning signs that indicate declining performance.
Common signs include:
- Difficulty holding a charge
- Voltage dropping below normal levels (around 12.2V or lower)
- Slow engine cranking or failure to start
- Increased need for frequent recharging
Internally, deterioration includes loss of active materials and increased resistance, which reduces efficiency and reliability over time.
Taking Steps to Maintain Charge and Health
Proper storage and maintenance can help slow degradation and extend its life during periods of inactivity.
Recommended practices:
- Store the it in a cool, dry environment
- Keep it at a moderate charge level, avoiding full discharge or overcharging
- Check voltage periodically
- Recharge before it reaches damaging low levels
Even simple actions like occasional use or maintenance charging can help prevent deep discharge and preserve performance.
Testing and Activating Batteries Before Use
Before using it that has been sitting unused, it is important to check its condition to ensure reliable performance. One of the first steps is to measure the voltage, as a healthy battery should typically read around 12.6V when fully charged. If the voltage is lower, it should be recharged using a proper charger to restore safe charge levels.
It is also recommended to perform a load test to verify whether the it can deliver power under real conditions. In addition, a visual inspection should be carried out to check for signs of swelling, corrosion, or leakage. Even if it appears to charge normally, internal degradation may reduce its ability to perform effectively, which can lead to failure when the battery is placed under load.
Key Takeaways.
- Unused batteries degrade over time due to internal chemical reactions.
Even when not connected, batteries undergo calendar aging and self-discharge. This leads to reduced charge, capacity loss, and possible permanent damage. - Self-discharge gradually reduces battery performance.
Batteries can lose noticeable charge within 4–6 weeks and continue degrading over time. Low voltage and prolonged storage increase internal resistance and reduce power delivery. - Temperature and storage conditions strongly affect battery lifespan.
High temperatures accelerate degradation, while extreme cold impacts performance. Storing batteries in cool, moderate conditions with proper charge levels slows aging. - Signs of deterioration indicate reduced reliability.
Common symptoms include difficulty holding a charge, low voltage, and slow engine starting. Internal damage, such as increased resistance and material loss, reduces efficiency. - Proper maintenance and testing help preserve its health.
Regular voltage checks, recharging, and correct storage conditions prevent deep discharge. Before use, testing voltage and performing load checks ensures the battery can operate reliably.
FAQs:
How long can a new car battery sit on a shelf?
A new car battery can begin losing charge within a few weeks and may become partially or fully discharged after a couple of months if left unused without maintenance.
Can a car battery still be good after sitting for a year?
It may still function, but long storage can cause capacity loss, increased internal resistance, and reduced reliability, especially without proper maintenance or charging.
Can a new battery go bad from sitting?
Yes, a new battery can degrade over time due to self-discharge and internal chemical reactions, which may lead to permanent damage if the voltage drops too low.
How long does a brand new car battery last if not used?
Without use or maintenance, performance can decline within weeks to months, as the battery gradually loses charge and may deteriorate over time.
You May also Like:
How Much Does a Car Battery Replacement Cost? Typical Prices
Can a Dead Car Battery Be Recharged or Need Replacement?
How Long Does a Car Battery Replacement Take?
Are All Car Battery Brands the Same? What Drivers Should Know
At first glance, most car batteries look nearly identical, but does that mean they perform the same? Many drivers assume one brand is just like another, until unexpected failures prove otherwise. If you’ve ever wondered, are all car battery brands the same? The answer involves more than just price or size, and comprehending it could save you from costly surprises.
Fast assistance from car battery replacement in Brooklyn.
TL;DR:
Car battery brands are not all the same, differences in technology, materials, and design affect lifespan, performance, and reliability. Factors like CCA, reserve capacity, maintenance needs, and warranty also matter. Choosing the right one depends on your vehicle type, climate, and driving habits, not just the brand, ensuring better durability and long-term performance.
How do Car Battery Brands Differ in Lifespan and Quality?
Brands can differ in both lifespan and overall quality, but these differences are mainly influenced by factors such as battery technology, design, and manufacturing standards rather than just the brand name. In general, conventional lead-acid batteries typically last 3 to 6 years, while more advanced designs like AGM or lithium-based systems can last significantly longer under proper conditions.
Quality differences are often seen in how well a battery resists degradation, maintains charge capacity, and performs under stress such as extreme temperatures or repeated use.
Its lifespan is also closely related to state of health (SoH) and usage patterns. Even a high-quality battery may degrade faster if it is not properly maintained or is frequently exposed to harsh conditions. For this reason, while brand reputation can play a role, the most important factors are the materials, internal design, and technology type, which directly affect durability and consistent performance over time.
Comparing Battery Lifespan Across Brands
When comparing battery lifespan across brands, it is important to consider differences in internal chemistry and structure. Traditional lead-acid batteries generally last 3–5 years and provide around 300–500 charge cycles, while AGM batteries may last longer due to better resistance to vibration and deeper discharge cycles. More advanced technologies, such as lithium-based batteries, can last 8–15 years or more with a much higher cycle life, although they are more common in hybrid or electric vehicles.
Even within the same type, lifespan can vary depending on design factors such as:
- Plate thickness and material purity
- Resistance to sulfation, a common cause of failure in lead-acid batteries
- Internal design affecting heat tolerance
Nonetheless, external factors like temperature, depth of discharge, and maintenance habits often have a greater impact on battery lifespan than brand differences alone.
Evaluating Performance and Reliability Factors
Performance and reliability are essential when comparing brands. A high-quality battery should provide consistent starting power, maintain stable voltage, and perform well in both hot and cold conditions.
One important factor is cold cranking amps (CCA), which measures how effectively a battery can start an engine in low temperatures. Batteries with higher CCA ratings generally offer better reliability in colder environments. Another measure is reserve capacity, which indicates how long the battery can power essential systems if the alternator fails.
Reliability is also influenced by how well it resists degradation over time. Research indicates that factors such as temperature management and energy efficiency play a major role in battery lifespan. Higher-quality batteries are typically designed with better materials and construction, allowing them to maintain stable performance over repeated use.
These batteries often use improved separators and electrolytes, offer greater resistance to vibration, and deliver more consistent power. In contrast, lower-quality options may experience faster capacity loss and uneven performance.
Noticing Differences in Warranty and Support
Warranty and customer support can indicate how reliable a battery is expected to be. Most standard batteries come with 1 to 3 years of coverage, while premium options may offer 4 to 5 years or more.
Main points to consider:
- Longer warranties often suggest higher durability and better manufacturing standards
- Lower failure rates are typically associated with extended coverage
- Some brands offer pro-rated warranties after the initial coverage period
- Additional support may include easier replacement processes or extra services
These differences reflect how manufacturers evaluate their product’s real-world performance and reliability.
Assessing Maintenance and Charging Requirements
Maintenance needs vary depending on the type and design. Traditional flooded batteries require regular upkeep, while modern designs reduce the need for user intervention.
Differences include:
- Flooded lead-acid batteries require electrolyte checks, terminal cleaning, and proper charging
- Poor maintenance can lead to shortened lifespan and performance issues
- AGM and lithium-based batteries are typically maintenance-free
- These modern batteries charge more efficiently and handle partial charge states better
- Improved internal design helps reduce common issues like corrosion or leakage
Overall, batteries with lower maintenance requirements and better charging efficiency tend to offer longer and more reliable performance.
Choosing the Best Battery for Your Vehicle Needs
Choosing the right one involves more than selecting a well-known brand. It requires matching the battery’s features with your vehicle type, driving conditions, and usage habits to ensure reliable performance and durability.
Several factors should be considered:
- Vehicle type: Standard vehicles may use conventional batteries, while start-stop systems or electric vehicles may require more advanced options
- Climate conditions: Hot temperatures can accelerate its degradation, while cold climates require higher cold cranking amps (CCA) for reliable starting
- Driving habits: Frequent short trips can affect battery performance differently than consistent long-distance driving
- Electrical load: Vehicles with more electronic systems need batteries with higher reserve capacity to support additional power demands
For many drivers, a high-quality lead-acid or AGM battery provides a balanced combination of cost and performance. Nevertheless, vehicles with advanced systems or higher energy requirements may benefit from a more durable and efficient battery, offering better long-term value.
Key Takeaways.
- Car battery brands differ based on technology and build quality, not just name.
Lifespan and performance depend on materials, design, and manufacturing standards. Factors like usage patterns and maintenance also strongly influence durability. - Battery lifespan varies by type and external conditions.
Lead-acid batteries typically last 3–6 years, while AGM and lithium options can last longer. Temperature, charging habits, and maintenance often impact lifespan more than brand alone. - Performance depends on metrics like CCA and reserve capacity.
Higher cold cranking amps improve starting in cold weather, while reserve capacity supports electrical systems. Better-designed batteries provide stable power and resist degradation over time. - Warranty and maintenance requirements reflect battery reliability.
Longer warranties often indicate higher durability and lower failure rates. Modern batteries require less maintenance and offer more efficient charging than traditional designs. - Choosing the right battery depends on your vehicle and driving conditions.
Factors such as climate, driving habits, and electrical load should guide selection. Matching the type to your needs ensures better performance, longevity, and overall value.
FAQs:
Does it matter what brand of car battery you get?
Yes, but not just the brand name itself. What matters most is the battery’s technology, build quality, and specifications, which affect lifespan, performance, and reliability under different conditions.
How much is a battery?
The price can vary depending on several factors such as the battery model you need, the brand, where you buy it, and the installation service.
What is the most reliable brand of car batteries?
Reliability depends on factors such as materials, design, performance ratings, and warranty coverage, rather than brand alone.
Are all car battery brands equal?
No, car battery brands are not equal. Differences in technology, manufacturing quality, and design features can lead to variations in lifespan, performance, and durability.
You May also Like:
How Much Does a Car Battery Replacement Cost? Typical Prices
Can a Dead Car Battery Be Recharged or Need Replacement?
How Long Does a Car Battery Replacement Take?
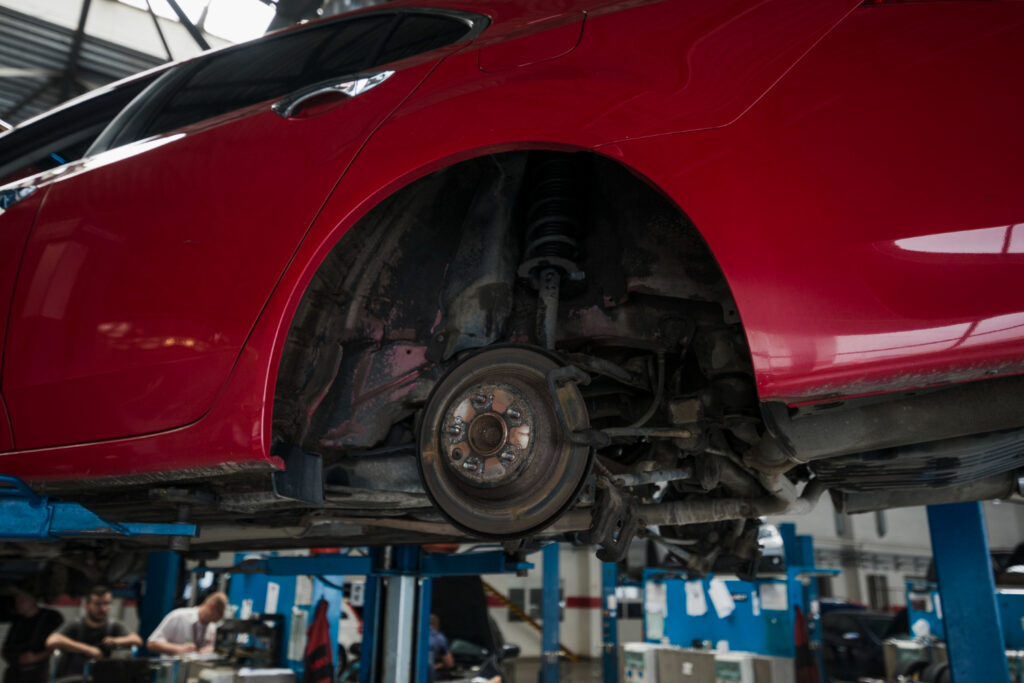
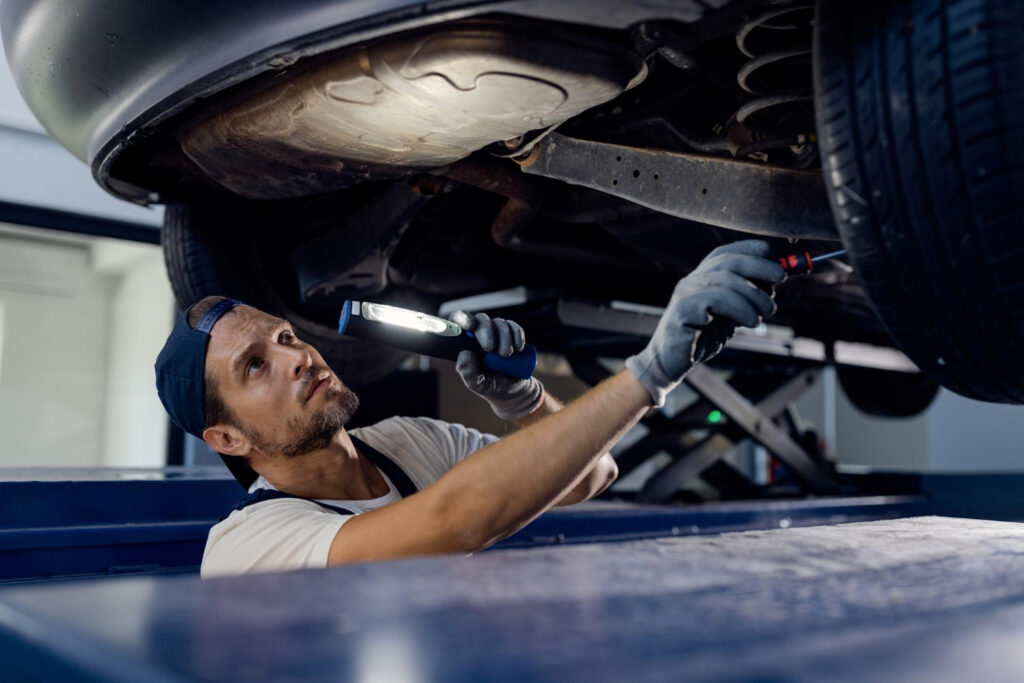
Car Suspension Parts Explained for Modern Vehicles
Your car may feel smooth and stable on the road, but dozens of hidden components are working together beneath it to make that possible. Many drivers never think about them, until something starts to feel off. If you’ve ever wondered about car suspension parts, comprehending these components reveals how modern vehicles maintain comfort, control, and safety.
Vehicle support with car suspension service in Brooklyn.
TL;DR:
A car suspension system connects the wheels to the chassis and helps maintain comfort, stability, and control while driving. Main components, including springs, shock absorbers, control arms, anti-roll bars, struts, and steering knuckles, work together to absorb road shocks, control movement, maintain wheel alignment, and keep tires in contact with the road for safe handling and ride comfort.
What components form a car suspension system?
A car suspension system is a mechanical assembly that connects the vehicle’s wheels to the chassis while maintaining comfort, stability, and control. Its main purpose is to absorb road shocks, keep tires in contact with the road, and support proper handling during acceleration, braking, and cornering. It also helps distribute loads and reduce vibrations that could affect passenger comfort and vehicle durability.
Most suspension systems include several interconnected components that manage forces acting on the vehicle. Essential elements include springs, shock absorbers (dampers), control arms, stabilizer bars, steering knuckles, and structural assemblies such as struts. Springs support the vehicle’s weight and store energy when encountering bumps, while dampers regulate spring movement to prevent excessive bouncing.
Structural parts such as steering knuckles and suspension links connect the wheel hub to the suspension geometry, allowing the wheel to pivot for steering while maintaining stability. Together, these components create an integrated system that balances ride comfort, vehicle control, and structural durability.
Vertical Force Absorption Through Coil and Leaf Springs
Springs absorb vertical forces created when a vehicle travels over bumps or uneven surfaces. They compress and extend to store and release energy, helping reduce the force transferred to the vehicle body.
| Spring Type | Main Function |
| Coil Springs | Compress under load and release stored energy to cushion impacts |
| Leaf Springs | Distribute loads across stacked metal strips, often used in heavier vehicles |
Both spring types support the vehicle’s weight and help maintain continuous tire contact with the road.
Oscillation Control via Hydraulic Dampening Units
After springs absorb energy, they naturally continue to oscillate. Shock absorbers regulate this motion and help stabilize the suspension.
Main functions include:
- Controlling spring movement after compression and rebound
- Reducing vibrations that could affect ride comfort
- Maintaining tire contact with the road surface
- Improving handling stability during braking or acceleration
Inside the shock absorber, a piston moves through hydraulic fluid, converting kinetic energy into heat and slowing its movement.
Geometric Alignment Management Using Control Arms
Control arms guide wheel movement and suspension geometry. They connect the vehicle frame to the steering knuckle, allowing the wheel to move vertically while remaining aligned with the chassis.
Most control arms are shaped like a wishbone or “A” design and include:
- A frame connection through bushings that allows controlled movement
- A ball joint connection to the steering knuckle for steering rotation
This structure helps maintain tire alignment, steering precision, and stable handling during suspension travel.
Lateral Stability Maintenance via Anti-Roll Bars
Anti-roll bars improve vehicle stability during cornering and uneven road conditions. They connect the systems on both sides of the vehicle and help balance forces between the wheels.
When the vehicle turns and body roll begins, the bar twists slightly and transfers load between the left and right suspension sides. This action helps the vehicle remain more level during turns and improves traction by keeping tires evenly pressed against the road surface.
Weight Distribution Management Through Struts and Knuckles
Struts and steering knuckles help manage load distribution and structural alignment within the suspension system. A strut typically combines a shock absorber and coil spring into one assembly, allowing it to perform both damping and load-bearing functions.
| Component | Role in the Suspension |
| Strut | Supports vehicle weight and helps maintain suspension alignment |
| Steering Knuckle | Connects the wheel hub, suspension links, and steering system |
Together, these parts help distribute forces throughout the suspension system while maintaining stable steering and structural integrity.
Key Takeaways.
- The suspension system connects the wheels to the vehicle and maintains stability.
It absorbs road shocks, reduces vibrations, and keeps tires in contact with the road. This helps ensure ride comfort, safe handling, and overall vehicle durability. - Several components work together to manage forces on the vehicle.
Important parts include springs, shock absorbers, control arms, stabilizer bars, struts, and steering knuckles. Together they support the vehicle’s weight and control wheel movement. - Springs absorb impacts and support the vehicle’s weight.
Coil springs compress and release energy to cushion road bumps. Leaf springs distribute loads across layered metal strips, often used in heavier vehicles. - Shock absorbers control motion and prevent excessive bouncing.
They regulate spring movement by converting kinetic energy into heat through hydraulic fluid. This reduces vibrations, improves ride comfort, and maintains tire contact with the road. - Control arms, anti-roll bars, and struts maintain alignment and stability.
Control arms guide wheel movement and preserve alignment, while anti-roll bars reduce body roll during turns. Struts and steering knuckles distribute loads and support stable steering and suspension geometry.
FAQs:
What are the parts of a car’s suspension?
The main parts of a car suspension include springs, shock absorbers (dampers), control arms, stabilizer bars, steering knuckles, and struts. These components work together to absorb road shocks, guide wheel movement, and maintain vehicle stability.
What are the 4 types of suspension?
Four common suspension spring types used in vehicles are coil springs, leaf springs, torsion bars, and air springs. Each type supports the vehicle’s weight and helps absorb impacts from uneven road surfaces.
What parts are the essentials of suspensions?
Essential suspension components include springs, shock absorbers, control arms, stabilizer bars, and structural parts like struts and steering knuckles. Together they manage wheel movement, maintain alignment, and keep the tires in contact with the road.
What suspension parts wear out first?
Parts that experience constant movement and stress, such as shock absorbers, bushings, and suspension linkages, often wear out first. When these components wear, drivers may notice increased bouncing, reduced stability, or uneven tire wear.
You May Also Like:
How to Clean Car Suspension Parts? Best Methods
Mechanical Parts Repair: Finding Services for Your Car
What Happens if I Don’t Align and Balance My Wheels?
How Car Suspension System Works in Modern Vehicles
Most drivers enjoy a smooth ride without ever thinking about what makes it possible. Beneath every vehicle is a system constantly absorbing bumps, controlling movement, and keeping the tires firmly on the road. But how does it all work together? comprehending how a car suspension system works reveals the hidden engineering that keeps modern vehicles stable, comfortable, and safe
Suspension maintenance with shock absorbers center service in Brooklyn.
TL;DR:
A car suspension system connects the wheels to the chassis and controls how the vehicle interacts with the road. Components like springs, shock absorbers, control arms, and anti-roll bars absorb impacts, regulate movement, and maintain wheel alignment. Together, they keep tires in contact with the road, improving comfort, stability, traction, and overall driving safety.
What Is a Car Suspension System and Why Is It Important?
A car suspension system is a group of mechanical components that connects the vehicle’s wheels to the chassis and allows controlled movement between them. Its main purpose is to manage the interaction between the vehicle and the road surface, improving stability, comfort, and safety while driving. The system typically includes parts such as springs, shock absorbers, control arms, and linkages that work together to support the vehicle’s weight and absorb road irregularities.
The suspension system supports the weight of the vehicle body, engine, passengers, and cargo while allowing the wheels to move vertically when encountering bumps or uneven terrain. This movement helps reduce road vibrations reaching the cabin and improves ride comfort. At the same time, it helps maintain tire contact with the road, which is essential for proper steering, braking, and overall vehicle control.
Modern suspension designs aim to balance ride comfort and vehicle handling. If the suspension is too soft, the vehicle may sway during turns, while a very stiff system can transmit stronger vibrations from the road. Because of its role in maintaining tire alignment and road contact, the suspension system is critical for vehicle performance and driving stability.
Energy Absorption Through Coil Springs and Leaf Springs
Springs are the main energy-absorbing components of a suspension system. When a vehicle encounters bumps or dips in the road, the wheels move relative to the chassis and the springs compress or expand to absorb the impact. This process helps prevent the force from transferring directly to the vehicle body and contributes to a smoother ride.
Two common types of springs used in suspensions are coil springs and leaf springs. Coil springs are made from a steel rod wound into a helix that compresses under load and stores mechanical energy, then releases it as the spring returns to its original shape. Leaf springs consist of several stacked metal strips called leaves, which distribute loads across a wider surface and provide strong support for heavier vehicles such as trucks or cargo vans. In both designs, springs temporarily store and release energy created by road irregularities.
Kinetic Dampening via Hydraulic Shock Absorbers
While springs absorb the initial impact, shock absorbers control how that energy is released and prevent continuous bouncing.
- Control spring movement: They prevent repeated bouncing after the spring compresses and rebounds.
- Hydraulic resistance: A piston moves through hydraulic fluid inside a sealed cylinder, creating resistance.
- Energy conversion: Kinetic energy from suspension movement is converted into heat energy.
- Improved stability: This process reduces vibrations and helps maintain tire contact with the road.
By regulating suspension motion, shock absorbers help maintain vehicle stability, traction, and passenger comfort.
Wheel Alignment Maintenance Using Control Arms and Links
Control arms and suspension links guide wheel movement while maintaining correct alignment with the vehicle chassis. These components connect the wheel hub and steering knuckle to the frame, allowing the wheels to move up and down without affecting steering geometry.
When a vehicle drives over uneven surfaces, control arms act as hinged links that support the wheel assembly and keep it properly positioned. This helps maintain alignment angles such as camber and caster, ensuring the tires stay correctly positioned on the road. Proper alignment improves tire wear, steering stability, and braking performance, while damaged or misaligned components can make the vehicle harder to control.
Anti-Roll Bar Stabilization During Cornering
During turns, the vehicle body tends to lean toward the outside of the corner. This effect, known as body roll, happens because forces shift weight to the outer wheels. Anti-roll bars help reduce this leaning and improve stability.
Main functions of anti-roll bars include:
- Connecting the left and right suspension sides across an axle
- Twisting during turns to resist excessive body roll
- Balancing load between wheels during cornering
- Improving traction and steering control
By helping the vehicle remain more level during turns, anti-roll bars support better handling, stability, and driver confidence.
Final Force Distribution to the Tire Contact Patch
The main goal of the suspension system is to transfer forces from the vehicle and the road to the tire contact patch, the small area where the tire touches the ground. This is where traction, braking, and steering forces are applied during driving.
Through the coordinated action of springs, dampers, and linkages, the suspension controls wheel movement, absorbs shocks, and maintains alignment. This helps keep the tires in consistent contact with the road, even on uneven surfaces.
Maintaining this contact is critical because tire grip determines the vehicle’s ability to accelerate, steer, and stop safely. By regulating forces and motion, the suspension system helps support vehicle stability, control, and driving safety.
Key Takeaways.
- The suspension system connects the wheels to the vehicle and manages road interaction.
It supports the vehicle’s weight and allows controlled wheel movement over bumps or uneven terrain. This improves driving comfort, stability, and overall safety. - Springs absorb road impacts and help maintain ride height.
Coil springs and leaf springs compress and expand to store and release energy from road irregularities. This process reduces the force transferred to the vehicle body and helps create a smoother ride. - Shock absorbers control suspension movement and reduce bouncing.
They convert kinetic energy from spring motion into heat using hydraulic resistance. This stabilizes the vehicle, reduces vibrations, and helps maintain tire contact with the road. - Control arms and links maintain wheel alignment and steering stability.
These components guide vertical wheel movement while preserving alignment angles like camber and caster. Proper alignment improves tire wear, steering accuracy, and braking performance. - The suspension system ensures effective force transfer to the tire contact patch.
By regulating motion and load distribution, it keeps tires in consistent contact with the road. This contact is essential for traction, steering control, braking, and overall vehicle safety.
FAQs:
What are the 4 types of suspension systems?
Four common suspension spring types used in vehicles are coil springs, leaf springs, torsion bars, and air springs. Each type supports the vehicle’s weight and helps absorb shocks from uneven road surfaces.
What is the most common problem in a suspension system?
One common issue is worn suspension components, such as shock absorbers or linkages. When these parts wear out, the vehicle may bounce excessively, experience uneven tire wear, or have reduced steering stability.
What is the lifespan of a car suspension?
The lifespan of a suspension system varies depending on driving conditions and maintenance. Over time, components such as springs, shock absorbers, and links can wear out and may need inspection or replacement to maintain proper handling and stability.
How does 4X4 suspension work?
A 4X4 suspension works by allowing each wheel to move vertically over uneven terrain while maintaining tire contact with the ground. Components like springs, shock absorbers, and linkages absorb impacts and control movement to keep the vehicle stable and maintain traction.
You May Also Like:
How to Clean Car Suspension Parts? Best Methods
Mechanical Parts Repair: Finding Services for Your Car
What Happens if I Don’t Align and Balance My Wheels?
What Are the Parts of a Car Suspension in Modern Vehicles
Every smooth turn and stable ride depends on a hidden system working beneath your car, but most drivers never think about it until something goes wrong. If you’ve ever wondered what are the parts of a car suspension? The answer involves several components that work together to control movement, comfort, and safety.
Maintenance help from car suspension service in Brooklyn.
TL;DR:
A car suspension system supports the vehicle’s weight, absorbs road shocks, and keeps tires in contact with the road for safe handling. Main components include springs, shock absorbers, control arms, ball joints, and sway bars, each serving a specific role. Together, these parts improve ride comfort, stability, steering control, and overall vehicle performance.
What components make up a car suspension system?
A car suspension system is a complex arrangement of mechanical components designed to support the vehicle’s weight, absorb shocks from the road, and maintain tire contact with the driving surface. The suspension connects the wheels to the vehicle’s frame or chassis and allows controlled vertical movement when the vehicle encounters bumps, potholes, or uneven terrain. By balancing ride comfort with stability and steering control, the suspension system plays an essential role in vehicle safety and performance.
In general, the suspension system includes several essential components such as springs, shock absorbers, control arms, ball joints, and sway bars. Each of these parts performs a specific function but works together to maintain vehicle balance, reduce vibrations, and improve handling during driving. Automotive engineering sources describe the suspension as a system that supports the vehicle’s weight while allowing the wheels to move up and down while maintaining stability and control.
Springs That Support Vehicle Weight and Absorb Road Impact
Springs are one of the most fundamental components of a vehicle’s suspension system. Their primary role is to support the vehicle’s weight while absorbing the energy produced when the car travels over bumps or uneven road surfaces. When the wheels encounter an obstacle, the springs compress to absorb the impact and then expand to restore the vehicle’s ride height and stability.
Different types of springs are used in modern vehicles, each serving the same core purpose of supporting weight and maintaining tire contact with the road.
| Type of Spring | General Use |
| Coil Springs | Common in passenger cars |
| Leaf Springs | Often used in trucks and heavier vehicles due to durability and load capacity |
| Torsion Bars | Used in some vehicles for suspension support |
| Air Springs | Allow adjustable ride height and improved load control |
Shock Absorbers That Control Movement and Stability
Shock absorbers, also known as dampers, work together with the springs to control suspension movement. While springs absorb road impacts, they would continue bouncing if left uncontrolled. Shock absorbers reduce this motion by converting the kinetic energy from the spring movement into heat through hydraulic resistance.
Their main contributions to vehicle stability include:
- Reducing excessive bouncing after springs compress and rebound
- Maintaining tire contact with the road surface
- Improving braking, steering, and traction performance
- Limiting body motion during acceleration, braking, and cornering
When shock absorbers wear out, the vehicle may experience excessive bouncing, uneven tire wear, and reduced steering precision.
Control Arms That Connect Wheels to the Frame
Control arms are structural components that connect the vehicle’s wheels to the chassis or frame. They function as movable links that allow the wheels to move up and down while maintaining proper alignment relative to the vehicle body.
Most vehicles use a configuration that includes upper and lower control arms, although some suspension designs rely only on a lower control arm. The inner side of the control arm attaches to the vehicle frame through bushings, while the outer side connects to the steering knuckle that holds the wheel assembly.
By guiding vertical wheel movement, control arms help preserve steering accuracy, reduce uneven tire wear, and maintain overall vehicle stability during driving.
Ball Joints That Allow Smooth Steering Movement
Ball joints are small but essential components that act as pivot points within the suspension system. They connect the control arms to the steering knuckles and allow the wheels to move both vertically and horizontally while remaining securely attached to the suspension structure.
Main characteristics of ball joints include:
- Ball-and-socket design that allows multidirectional movement
- Support for vehicle weight and driving forces
- Ability to allow suspension movement while enabling steering
Because ball joints operate under constant load and motion, they experience wear over time. When they become loose or damaged, they may cause clunking noises, uneven tire wear, and reduced steering control.
Sway Bars That Reduce Body Roll in Turns
Sway bars, also called stabilizer bars or anti-roll bars, are designed to reduce body roll when a vehicle turns. Body roll occurs when the vehicle’s body leans toward the outside of a turn due to centrifugal force.
These bars connect the suspension on the left and right sides of the vehicle. When the car leans during a turn, the bar twists slightly and transfers some of the load from the compressed side of the suspension to the opposite side. This action helps keep the vehicle more level and improves overall stability.
By limiting excessive body sway and maintaining consistent tire contact with the road surface, sway bars contribute to better traction, more balanced handling, and improved driver confidence.
Key Takeaways.
- The car suspension system supports the vehicle and maintains driving stability.
The suspension connects the wheels to the vehicle’s frame and allows controlled vertical movement.
Its main role is to absorb road impacts while maintaining tire contact, comfort, and safe handling. - Multiple components work together to ensure balance and control.
Main suspension parts include springs, shock absorbers, control arms, ball joints, and sway bars. Each component performs a specific function but operates together to reduce vibrations and improve vehicle stability. - Springs absorb road impacts and support vehicle weight.
Springs compress when the vehicle encounters bumps and expand to restore ride height. Types such as coil springs, leaf springs, torsion bars, and air springs all help maintain tire contact with the road. - Shock absorbers control movement and prevent excessive bouncing.
They work with springs to stabilize the suspension by converting motion into heat through hydraulic resistance. Properly functioning shock absorbers improve braking, steering, traction, and overall driving control. - Control arms, ball joints, and sway bars maintain alignment and cornering stability.
Control arms guide wheel movement, while ball joints allow steering and suspension motion. Sway bars reduce body roll in turns, helping the vehicle stay level and maintain traction.
FAQs:
What are the main parts of a car suspension?
The main parts of a car suspension include springs, shock absorbers, control arms, ball joints, and sway bars. These components work together to support the vehicle’s weight, absorb road impacts, and maintain stability and tire contact with the road.
What are the components of a suspension called?
The components of a suspension are generally referred to as springs, dampers (shock absorbers), control arms, ball joints, and stabilizer or sway bars. Each part performs a specific function that helps control wheel movement and improve handling.
What are the 4 types of suspension?
Four types of suspension springs commonly used in vehicles are coil springs, leaf springs, torsion bars, and air springs. Each type supports the vehicle’s weight and helps absorb shocks from uneven road surfaces.
What parts do suspensions have?
Suspension systems typically include springs, shock absorbers, control arms, ball joints, and sway bars. These parts allow the wheels to move vertically, reduce vibrations, and help maintain vehicle balance and control during driving.
You May Also Like:
How to Clean Car Suspension Parts? Best Methods
Mechanical Parts Repair: Finding Services for Your Car
What Happens if I Don’t Align and Balance My Wheels?
How to Paint Car Suspension Parts for Long-Lasting Finish
Ever noticed how freshly painted suspension parts can transform the look of a car, yet many finishes start chipping within months? The secret isn’t just the paint you choose. If you’ve ever wondered how to paint car suspension parts? the right way, there’s a specific process professionals follow that most DIY guides overlook. Miss one step, and the finish won’t last.
Assistance with car suspension service in Brooklyn.
TL;DR:
To paint car suspension parts for a long-lasting finish, follow a careful process: thoroughly clean and degrease the components, sand the surface to improve adhesion, apply primer to protect the metal, and spray durable automotive paint in thin coats. Finally, allow the coating to fully cure before reinstalling the parts to ensure durability, proper protection, and a smooth, lasting finish.
Cleaning Suspension Parts to Remove Dirt and Grease
The first and most critical step when painting suspension components is cleaning suspension parts properly. These parts collect heavy contamination from road grime, grease, brake dust, and oil leaks. If these contaminants remain, they can prevent paint from bonding correctly and lead to defects such as fisheyes, peeling, or uneven coating. Automotive refinishing guidelines emphasize that surface cleanliness is essential for proper adhesion because even invisible contaminants can interfere with paint curing.
The process typically begins with washing the parts using warm water and a mild detergent to remove loose dirt. After this initial wash, a degreasing agent should be applied to dissolve oils, wax residues, and lubricants that commonly remain on suspension components. Degreasers are particularly important because oils can stay trapped in microscopic surface pores even after washing with soap alone, making grease removal a necessary step before painting.
In addition to chemical cleaning, mechanical cleaning may be needed to remove rust, old paint, and hardened debris. Tools such as wire brushes, abrasive pads, or pressure washing equipment can help clean difficult areas. Special attention should be given to crevices, joints, and mounting points where contaminants often accumulate. Once the parts are fully cleaned, they must be completely dry and wiped with lint-free cloths to ensure no residue remains on the surface.
Sanding the Surface for Better Paint Adhesion
After suspension components are properly cleaned, the next step is sanding the surface to prepare it for primer and paint. This step is essential because it removes remaining rust or old coatings while creating a slightly rough texture that improves paint adhesion. Smooth or glossy surfaces can cause coatings to slide or separate, so achieving a uniform matte texture helps ensure it bonds correctly and lasts longer.
Main steps involved in the sanding process:
- Start with medium-grit sandpaper to remove corrosion, oxidation, or flaking paint from the surface.
- Use wire brushes or abrasive discs if heavy rust is present and bare metal needs to be exposed.
- Switch to finer sandpaper after major imperfections are removed to smooth the surface and reduce deep scratches.
- Focus on creating microscopic grooves that help the primer form a strong mechanical bond with the metal.
- Pay special attention to edges, corners, and tight areas, since it often peels first in these locations if preparation is incomplete.
- Remove all sanding dust before continuing, typically using compressed air, tack cloths, or solvent wipes.
Research in automotive refinishing indicates that inadequate surface preparation is a common cause of coating failure, which makes proper sanding an important step for durable adhesion.
Applying Primer to Protect Metal Components
Once the surface preparation is complete, the next step is applying primer to create a protective and adhesive base for the paint. Primer works as an intermediate layer between bare metal and the final coating. Its main purpose is to improve adhesion, seal the surface, and help protect metal components from corrosion.
Suspension parts are especially vulnerable to rust because they are constantly exposed to moisture, road salt, and debris, making the use of a high-quality automotive primer important for durability.
Considerations when applying primer:
- Primer creates a bonding layer that helps the paint adhere more effectively to the metal surface.
- It also helps seal the surface and cover small imperfections that remain after sanding.
- Certain types, such as epoxy or rust-inhibiting primers, are often recommended for metal components because they provide increased corrosion resistance.
- Apply the primer in thin, even coats rather than one heavy layer to avoid uneven surfaces or adhesion problems.
- Allow each coat to flash or partially dry before applying the next layer to support proper curing and reduce the risk of runs or sagging.
After the primer has fully dried, light sanding may be performed to smooth out minor imperfections and prepare the surface for the final coat. This step helps create a more uniform finish and supports long-term adhesion of the paint layer.
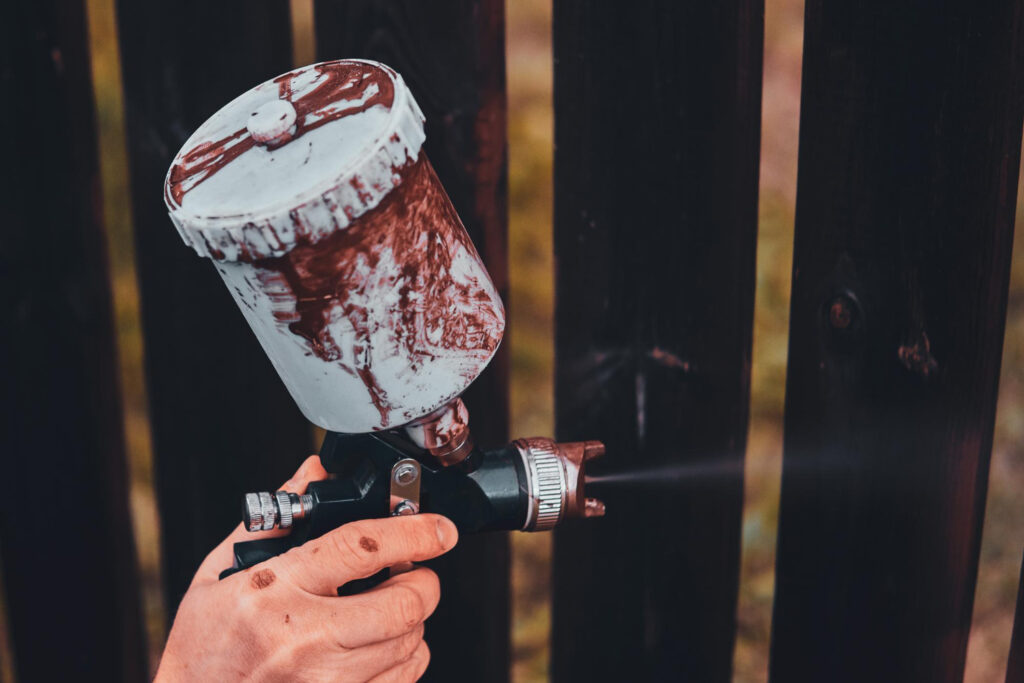
Spraying Even Coats of Durable Automotive Paint
After the primed surface is prepared, the next step is spraying durable automotive paint onto the suspension components. The paint used must be strong enough to withstand impacts from debris, moisture exposure, and constant mechanical stress. Because of these conditions, specialized automotive paints or chassis coatings are often used since they provide improved resistance to corrosion, abrasion, and chemicals.
To achieve a uniform finish, it is typically applied using spray equipment or aerosol automotive coatings. Instead of applying one heavy layer, the paint should be sprayed in several thin coats. This approach improves adhesion and helps prevent issues such as drips, uneven coverage, or trapped solvents within the coating.
Each coat should be allowed to partially dry before the next layer is applied. During this stage, maintaining a steady spraying distance and using controlled, overlapping passes helps ensure it covers the surface evenly. Some refinishing processes may also include a clear protective topcoat, which increases resistance to scratches, ultraviolet light, and environmental exposure.
Allowing Proper Drying and Reinstalling the Parts
The final step in painting suspension components is allowing it to cure completely before reinstalling the parts on the vehicle. Curing is the chemical process through which the paint hardens and reaches its full durability. If the parts are reinstalled too soon, the coating may still be soft and vulnerable to scratches, fingerprints, or mechanical damage. Depending on the type of paint and environmental conditions, curing may take several hours or more than a full day. Automotive coatings typically cure best with adequate ventilation, moderate temperatures, and low humidity, so following recommended drying time guidelines is important.
Once it has fully cured, the suspension components can be carefully reinstalled on the vehicle. During reassembly, proper alignment and secure fastening of all mounting points should be verified to ensure the suspension system functions correctly. When the entire process is completed properly, the final finish can provide improved appearance and long-lasting protection against corrosion and wear.
Key Takeaways.
- Proper preparation is essential for a long-lasting finish.
Painting suspension parts requires a specific step-by-step process.
Skipping preparation stages can cause the finish to chip, peel, or fail quickly. - Thorough cleaning ensures proper paint adhesion.
Suspension components accumulate grime, grease, brake dust, and oil.
Washing, degreasing, and removing debris prevent contaminants from interfering with paint bonding. - Sanding creates the right surface for primer and paint.
Sanding removes rust and old coatings while forming a uniform matte texture.
This rough surface helps primer and paint bond securely to the metal. - Primer and paint must be applied in controlled layers.
Primer improves adhesion, seals the surface, and protects metal from corrosion.
Durable automotive paint should be sprayed in several thin coats for even coverage and better durability. - Proper curing and careful reinstallation complete the process.
Paint must fully cure before reinstalling suspension parts to avoid damage.
Correct reassembly ensures both long-lasting protection and proper suspension performance.
FAQs:
How to paint suspension parts?
To paint suspension parts, first clean and degrease them thoroughly to remove dirt and oils. Next, sand the surface to create a rough texture for better adhesion, apply primer, and spray durable automotive paint in several thin coats. Allow it to fully cure before reinstalling the parts.
Can I paint my suspension parts?
Yes, suspension parts can be painted if they are properly prepared. Cleaning, sanding, priming, and applying durable automotive paint are essential steps to ensure the coating adheres well and provides long-lasting protection.
What to spray on suspension parts?
Specialized automotive paint or chassis coatings are typically used on suspension parts. These coatings are designed to resist corrosion, abrasion, moisture, and chemicals while providing a durable protective finish.
Will paint peel off of plastic?
It can peel off plastic surfaces if they are not properly prepared. Proper surface preparation and the use of appropriate primer and coatings help improve adhesion and reduce the risk of peeling.
You May Also Like:
How to Clean Car Suspension Parts? Best Methods
What Happens if I Don’t Align and Balance My Wheels?
How Long Does a Collision Repair Take?
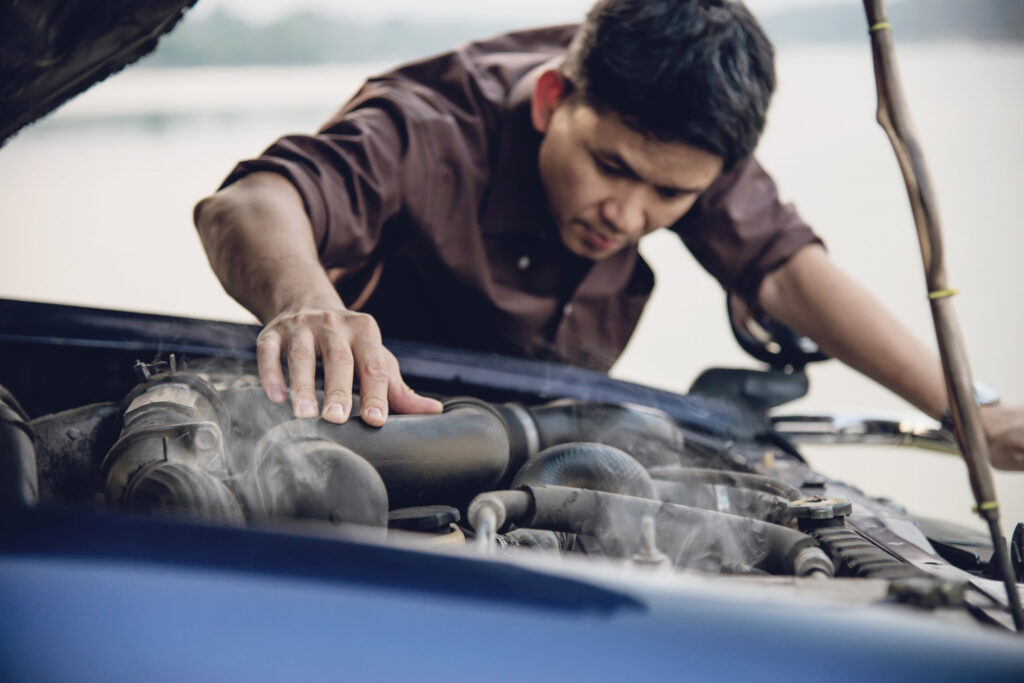
Can a Faulty Thermostat Cause Engine Overheating?
Your temperature gauge spikes without warning, and suddenly you’re left asking: Can a Faulty Thermostat Cause Engine Overheating? It’s a small, inexpensive part, but it plays a critical role in engine temperature control. Could this tiny valve really be the reason your engine is running hot? The answer may surprise you, and save you from serious damage.
Fast and dependable cooling system repair service.
TL;DR:
A faulty thermostat can cause engine overheating by disrupting coolant flow and preventing proper temperature regulation. When working correctly, it maintains optimal temperature for efficiency, performance, and longevity. Symptoms of failure include overheating, running too cold, erratic gauge readings, and poor heater performance. Ignoring issues can lead to serious engine damage. Testing and replacement are standard cooling system maintenance procedures.
How Does a Thermostat Affect Engine Temperature?
The thermostat is a temperature-controlled valve in the cooling system that regulates coolant flow between the engine and the radiator. Its main role is to help the motor reach and maintain its ideal operating temp, which supports proper combustion efficiency, fuel economy, emissions control, and long-term durability. When the motor is cold, the temperature sensor remains mostly closed, allowing coolant to circulate only within the engine block so it warms up faster. Once the coolant reaches its set temp, the piece opens, directing coolant to the radiator to release excess heat.
This regulation is critical because internal combustion engines generate significant heat. Without proper control, it may run too cool, reducing efficiency and increasing wear, or overheat, potentially causing serious mechanical damage.
Function of the Thermostat in Regulating Coolant Flow
At the center of the temperature sensor operation is a temperature-responsive element, typically a wax pellet or thermo-sensing device. When the motor is cold, the thermostat stays closed and prevents coolant from flowing to the radiator, helping it reach its optimal temp more quickly. As the coolant warms and reaches the piece’s specific opening point, the sensing element expands and opens the valve, allowing coolant to travel to the radiator where heat is dissipated.
During normal driving, the thermostat continuously adjusts how much it opens or closes to keep the engine temperature within a narrow optimal range. This precise control improves combustion efficiency, reduces wear, and minimizes emissions.
Symptoms of a Stuck or Malfunctioning Thermostat
A malfunctioning thermostat can significantly disrupt engine temperature control. Common symptoms include:
- Overheating: A thermostat stuck closed prevents coolant from reaching the radiator, causing heat buildup and potential engine damage.
- Engine running too cold: A thermostat stuck open allows constant coolant circulation, preventing it from reaching normal operating temperature.
- Erratic temperature gauge readings: Sudden fluctuations may indicate irregular operation.
- Poor heater performance: Insufficient warm coolant reaching the heater core can reduce cabin heat.
- Coolant leaks or pressure changes: Failure of the thermostat or its housing seal may cause leaks and reduced cooling efficiency.
Influence on Engine Performance and Efficiency
When the thermostat functions properly, the engine quickly reaches and maintains its intended operating temperature. This heat stability plays a direct role in overall performance and fuel efficiency.
Efficient combustion depends on operating within the correct heat range. A motor that runs too cool burns fuel less efficiently, increasing fuel consumption. Maintaining proper temperature also supports lower emissions, since fuel burns more completely under stable conditions. In addition, consistent temp allows the motor control unit (ECU) to manage fuel delivery and ignition timing accurately, helping preserve power output and responsiveness.
Proper heat control also reduces mechanical stress. By preventing excessive heat or prolonged cool operation, the thermostat helps minimize thermal strain on metal components and reduces oil degradation, contributing to longer engine life. Without its correct function, the motor may overcool or overheat, leading to inefficient combustion, higher fuel usage, and uneven performance.
Risks of Ignoring Thermostat Problems
Ignoring thermostat problems can quickly escalate into more serious and costly issues. Because this piece directly controls temperature regulation, a malfunction can affect both engine components and the broader cooling system.
Potential risks include:
- Severe damage: Persistent overheating can warp internal components, crack the engine block, or blow head gaskets.
- Fuel waste and higher operating costs: Engines that never reach optimal temperature burn more fuel, increasing expenses.
- Increased emissions: Improper heat control can cause incomplete combustion and higher pollutant output.
- Cooling system stress: Components like the water pump and radiator may fail sooner due to added thermal strain or improper coolant circulation.
Methods to Test and Replace a Faulty Thermostat
Diagnosing and replacing a faulty thermostat involves a combination of observation, testing, and proper installation procedures. Identifying the issue accurately helps prevent unnecessary repairs and ensures stable temperature control.
Testing
There are several commonly used methods to determine whether a thermostat is functioning properly:
- Observe the temperature gauge: Erratic, unstable, or unusual gauge readings can indicate problems.
- Physical testing in hot water: After removing the piece, placing it in controlled hot water allows you to see whether it opens at its specified temp (typically around 80–90 °C). If it fails to open at the marked temperature, replacement is necessary.
- Infrared temperature measurement: Using an infrared thermometer to measure coolant heat before and after the thermostat helps confirm whether it responds correctly as the engine warms.
- Professional scan tools: Diagnostic tools in modern vehicles can analyze thermostat and coolant temperature sensor data to detect irregular patterns.
Replacing
Replacement generally follows these steps, though exact procedures vary by vehicle model:
- Drain coolant: Lower the coolant level below the thermostat housing to prevent spills.
- Remove housing: Disconnect hoses and remove the thermostat housing.
- Replace the thermostat: Install a new one specified for the engine.
- Inspect seals and gaskets: Replace gaskets to help prevent leaks.
- Refill coolant and bleed the system: Refill the cooling system and remove trapped air to ensure proper circulation.
Testing and replacement are standard elements of cooling system maintenance and are often recommended every 50,000–100,000 miles or when symptoms appear.
Key Takeaways.
- The thermostat plays a critical role in engine temperature control
It regulates coolant flow between the engine and radiator, helping it reach and maintain its ideal operating temperature. Proper regulation supports combustion efficiency, fuel economy, emissions control, and longevity. - Malfunctioning disrupt performance and cooling
A thermostat stuck closed can cause overheating, while one stuck open can prevent the engine from warming properly. Symptoms include erratic temperature readings, poor heater performance, coolant leaks, and unstable operation. - Temperature stability directly impacts efficiency and durability
Engines operating at the correct temperature burn fuel more efficiently, produce fewer emissions, and experience less mechanical stress. Poor function can lead to higher fuel use, uneven performance, and increased wear. - Ignoring thermostat problems can lead to serious damage
Persistent temperature imbalance may cause warped components, blown head gaskets, increased emissions, and added strain on cooling system parts. Early diagnosis helps prevent costly engine repairs. - Testing and replacement are straightforward maintenance steps
Thermostats can be tested through gauge observation, hot water checks, infrared measurements, or diagnostic tools. Replacement involves draining coolant, installing a new unit with fresh seals, and properly refilling and bleeding the system.
FAQs:
How can I fix my overheating problem?
Start by checking the thermostat, as it may be stuck closed and preventing coolant from reaching the radiator. Testing and replacing a faulty piece can restore proper coolant flow and stabilize engine temperature.
Why is my car saying it’s overheating?
Your motor may be overheating because the thermostat is not regulating coolant flow correctly. If it fails to open, heat builds up in the engine instead of being released through the radiator.
How to cool down an overheating car?
If overheating is caused by a stuck thermostat, the cooling system must be inspected and repaired. Restoring proper function allows coolant to circulate and remove excess heat effectively.
How to fix cooling system malfunction?
Diagnose the issue by observing temperature behavior, testing the thermostat, and using proper diagnostic tools. If it is faulty, replace it, refill coolant, and bleed the system to ensure proper circulation.
You May Also Like.
Car Overheating but Coolant Is Full? Find Out Why
How Engine Cooling System Works to Prevent Overheating
Mechanical Parts Repair: Finding Services for Your Car
Radiator Repair vs. Replacement: Which One Do You Need?
Your temperature gauge starts creeping up, and now you’re facing a costly question: Radiator Repair vs. Replacement, which is the smarter move? The answer isn’t always obvious. Sometimes a simple fix is enough, while other situations demand a full replacement. Knowing the difference could save you hundreds, and prevent bigger engine trouble down the road.
Request expert cooling system repair service now.
TL;DR:
Deciding between radiator repair and replacement depends on the radiator’s condition, age, severity of damage, and long-term value. Minor leaks may be repaired, but extensive corrosion, recurring issues, or aging units often justify replacement. While repairs cost less upfront, replacement typically offers better reliability, warranty coverage, and improved cooling performance over time.
How Do You Know If a Radiator Needs Repair or Replacement?
Your vehicle’s radiator is a heat exchanger that removes excess engine heat by circulating coolant through metal tubes and fins, where heat is released into the air. This process keeps the engine at a safe operating temperature and prevents overheating-related damage. Without effective cooling, engines can quickly suffer warped components or even catastrophic failure.
Recognizing when a radiator needs attention is essential for safe driving and long-term engine reliability.
Signs of Leaks and Corrosion on the Radiator
One of the clearest indicators of radiator trouble is coolant leakage. Bright-colored fluid (green, orange, or pink) pooling beneath the front of a parked vehicle often signals a leak within the radiator or cooling system.
Corrosion and rust are also warning signs. When coolant breaks down or isn’t changed as recommended, oxidation can form inside the radiator’s metal surfaces. This weakens the structure and may lead to leaks or internal blockages. Visible rust on the exterior, discolored coolant, or crusty deposits around seams suggest the radiator’s integrity has deteriorated.
Even small leaks or corrosion patches reduce cooling efficiency. Ignoring them increases the risk of more serious failures, including engine overheating or head gasket damage.
Age and Condition of the Radiator
Radiators have a limited service life. A typical automotive radiator lasts about 8–10 years, though actual lifespan depends on maintenance, driving conditions, and environmental exposure.
Over time, repeated heating and cooling cycles, moisture, and contaminants weaken metal cores and plastic end tanks. Older radiators are more prone to cracks, brittle components, and internal buildup of debris or scale. When deterioration becomes extensive, repairs may only provide temporary relief, making replacement the more reliable long-term solution.
Regular coolant changes, pressure testing, and inspections can help monitor condition, but age alone increases the likelihood that replacement will eventually be necessary.
Performance Issues Affecting Engine Cooling
A radiator may appear intact yet still fail to cool effectively. Because its job is to dissipate heat through coolant flow and airflow, reduced efficiency often shows up as performance symptoms.
Warning signs include:
- Frequent engine overheating or a temperature gauge entering the danger zone
- Steam, hissing, or bubbling sounds under the hood
- Consistently low coolant levels after topping up
- Sludge or contaminated coolant visible in the reservoir
When these symptoms appear, especially alongside temperature fluctuations, a professional cooling system inspection is strongly recommended.
Cost Comparison Between Repair and Replacement
When radiator damage is identified, the decision between repair vs. replacement depends largely on the severity of the issue, the radiator’s overall condition, and long-term cost effectiveness.
Minor repairs, such as sealing a small leak or fixing a damaged fin, are usually less expensive than full replacement. A simple repair, including labor, typically costs a few hundred dollars, though the exact amount varies based on vehicle make, model, and location.
A complete radiator replacement costs more, often several hundred dollars for parts and labor. A new radiator is significantly more expensive than a minor repair, and labor costs depend on how easily the component can be accessed in the vehicle.
Replacement generally provides better long-term value when:
- The radiator is extensively corroded internally
- Multiple leaks are present or previous repairs have failed
- The radiator is near the end of its expected lifespan
- Repeated repair costs begin to exceed the price of a new unit
In summary, repair is typically appropriate for minor, isolated problems, while replacement is often more cost-effective for widespread damage or recurring failures and improves overall reliability.
Long-Term Reliability and Warranty Considerations
Choosing between radiator repair and replacement involves more than immediate cost. Long-term reliability and warranty coverage play an important role in overall value and peace of mind.
A new radiator typically includes a parts warranty and sometimes labor coverage, protecting you if a defect appears within a defined period. Repairs, especially small leak patches or corrosion seals, often have limited warranties and may fail again if underlying wear remains.
In terms of performance, a new radiator generally provides more consistent cooling and better heat dissipation than a worn unit. For older or high-mileage vehicles, replacement with warranty coverage can help prevent repeat failures and reduce the risk of future overheating issues.
Key Takeaways.
- Radiator problems require careful evaluation
The radiator removes engine heat to prevent overheating and serious damage. Determining whether to repair or replace depends on its condition, visible damage, and overall cooling performance. - Leaks, corrosion, and age are warning signs
Coolant leaks, rust, discoloration, and crusty deposits indicate structural deterioration. Radiators typically last 8–10 years, and extensive wear or internal buildup often makes replacement more practical than repeated repairs. - Performance symptoms signal reduced cooling efficiency
Frequent overheating, steam, low coolant levels, or contaminated coolant suggest the radiator may not be dissipating heat properly. These issues warrant prompt inspection to prevent engine damage. - Cost differences depend on severity and long-term value
Minor repairs are usually less expensive upfront, while full replacement costs more. Nevertheless, replacement becomes more cost-effective when damage is widespread, recurring, or near end-of-life. - Warranty and reliability favor replacement in many cases
New radiators often include warranty coverage and provide more consistent cooling. For older or high-mileage vehicles, replacement can reduce repeat failures and improve long-term reliability.
FAQs:
Should I replace or repair my radiator?
It depends on the severity of the damage. Minor, isolated issues like small leaks may be suitable for repair, while extensive corrosion, multiple leaks, or an aging radiator often make replacement the more reliable option.
Is it worth repairing a car radiator?
Repair can be worth it for small, localized problems. Nonetheless, if damage is widespread or recurring, replacement may provide better long-term value.
Are radiators worth fixing?
Radiators are worth fixing when the issue is minor and the unit is still in good overall condition. Larger structural problems usually justify replacement instead.
Is it worth replacing radiators?
Yes, especially when the radiator is near the end of its lifespan or has significant corrosion or repeated failures. Replacement improves reliability and often includes warranty coverage for added peace of mind.
You May Also Like.
How Often Should Car Radiator Be Flushed to Stay Reliable
How Much Does Engine Cooling System Repair Cost?
Engine Cooling System Service | Key Maintenance Tips
How Much Does Engine Cooling System Repair Cost?
Your temperature gauge spikes, and suddenly you’re left wondering: How Much Does Engine Cooling System Repair Cost? The answer isn’t always straightforward. Costs can vary widely depending on what’s failing and how severe the damage is. Before you panic it’s important to understand what really influences the final repair bill and what you might expect to spend.
Schedule professional cooling system services.
TL;DR:
Engine cooling system repair costs vary based on the failed component, vehicle type, labor time, and severity of damage. Minor issues are relatively inexpensive, while major failures or overheating-related engine damage can be costly. Parts choice (OEM vs. aftermarket) and shop rates also affect the total. Addressing cooling problems early helps prevent expensive secondary engine damage.
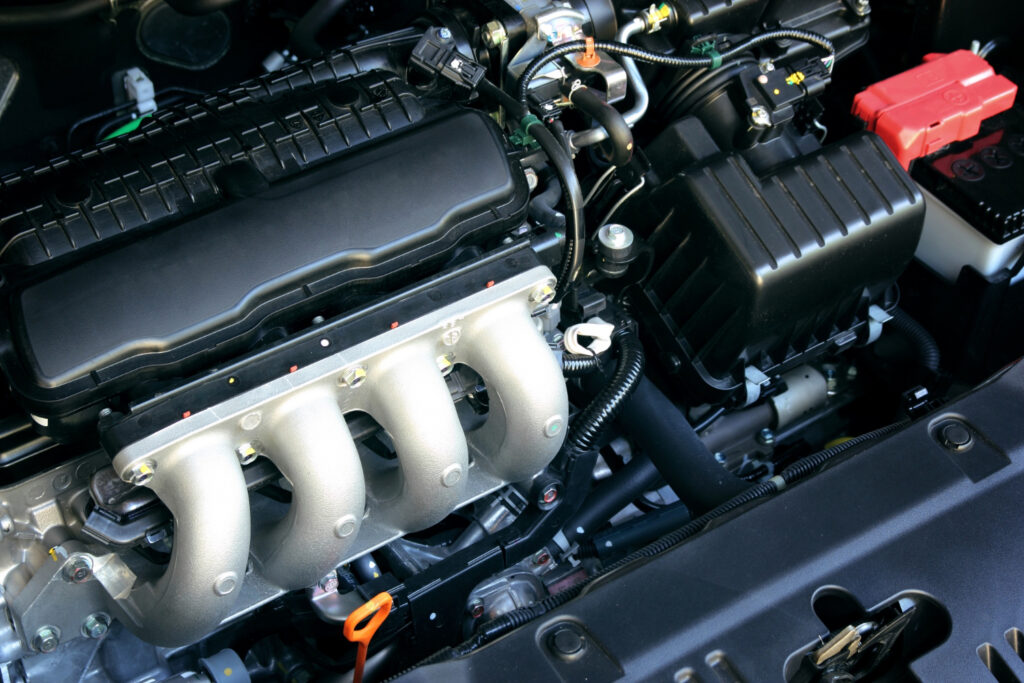
What Affects Engine Cooling System Repair Cost?
When a vehicle’s cooling system fails, repair costs can vary significantly because the system itself is made up of multiple interconnected components. It includes the radiator, water pump, thermostat, hoses, coolant fluid, cooling fans, and electronic temperature sensors. Since all of these parts work together to maintain a safe engine temperature, the total repair cost depends on which component fails and how the issue affects the rest of the system.
Several factors influence the final bill. First, which component is failing plays a major role. Smaller parts like hoses or a radiator cap are typically less expensive, while major components such as the water pump or radiator cost more to replace. Second, how difficult the part is to access can increase labor time. If a component is buried deep within the engine bay, labor costs rise accordingly. Third, the extent of damage matters. In some cases, a failed cooling component may lead to additional engine damage, which significantly increases repair costs.
Type of Vehicle and Engine Size
The type of vehicle and engine size play a major role in repair cost. Larger or more complex vehicles typically cost more to fix.
- Larger engines often require bigger radiators, hoses, and cooling fans, which increases parts cost
- Performance, luxury, or heavy-duty vehicles usually have tightly packed engine bays, making repairs more labor-intensive
- Longer labor times raise the total repair bill
- Smaller economy cars generally use simpler, standardized parts that are easier and less expensive to replace
Even within the same model year, vehicles with larger engines usually have more complex cooling systems, increasing both parts and labor costs.
Extent of Damage to Cooling Components
Repair cost also depends on how serious the cooling system problem is.
- Minor issues (such as hose leaks, thermostat failure, or radiator cap problems) are usually quicker and less expensive to fix
- Moderate damage (like radiator failure, water pump problems, or cooling fan motor failure) requires replacing major components and involves more labor
- Severe overheating damage can lead to warped cylinder heads, blown head gaskets, cracked engine blocks, or internal engine damage
Severe damage requires extensive engine work and can dramatically increase the total repair cost, sometimes approaching the cost of replacing the engine.
Cost of Replacement Parts vs. Repair
Another important factor that affects cooling system repair cost is whether a component can be repaired or must be replaced, and if replaced, what type of part is selected.
Repair vs. Replace
In some cases, a component can be repaired rather than replaced. For example, sealing a small radiator leak may cost less initially. Nevertheless, these repairs are often temporary solutions.
Replacing the damaged part usually costs more upfront, but it tends to provide a more reliable and long-term fix. Replacement can also help prevent repeat repairs that increase overall expenses over time.
Types of Replacement Parts
If replacement is necessary, the type of part chosen will affect the total cost.
- OEM (Original Equipment Manufacturer) parts match the components originally installed in the vehicle. They typically offer proper fit and reliable performance but come at a higher price.
- Aftermarket parts are usually less expensive, though quality can vary. A reputable repair shop may suggest high-quality aftermarket options to reduce costs without compromising performance.
In addition to the main component, mechanics may need to replace related items such as coolant fluid, gaskets, or seals, which adds to the total parts cost.
Labor Time and Mechanic Rates
Labor costs often make up a significant portion of the total cooling system repair bill. Two main factors determine how much you’ll pay for labor: the time required to complete the repair and the hourly rate charged by the shop.
Time Required to Perform the Repair
The complexity of the repair directly affects labor cost. Simple tasks, such as topping off coolant or replacing a radiator cap, may take less than an hour. More complex repairs—like replacing a water pump or repairing a head gasket—can require many hours or even a full day of work. The longer the job takes, the higher the labor cost.
Mechanic Rates by Region and Shop
Labor rates vary widely depending on several factors:
- Geographic location: Areas with higher living costs often have higher hourly rates
- Type of shop: Dealership service centers typically charge more per hour than independent repair shops
- Technician experience level: Certified technicians often command higher rates
In addition to labor for the repair itself, many shops charge a separate diagnostic fee to identify the problem before any repair work begins.
Related Repairs Linked to Overheating
A cooling system failure often affects more than just one component. Because excessive heat impacts multiple engine parts, secondary damage can significantly increase the total repair cost.
One common example is a blown head gasket, which may require removing the cylinder head, a labor-intensive and expensive procedure. In more severe cases, overheating can warp metal surfaces, leading to the need for cylinder head or engine block machining, or even replacement. These repairs add substantial labor and parts costs.
Overheating can also cause oil contamination if coolant mixes with engine oil due to internal leaks. This compromises lubrication and may require an oil system flush or further engine repairs. Additionally, temperature sensors or control modules may fail and require separate replacement.
Because overheating can trigger multiple related issues, addressing cooling system problems early helps prevent more extensive and costly damage. Many automotive experts emphasize that prompt repair reduces the risk of cascading failures.
Key Takeaways.
- Cooling system repair costs vary widely
The total price depends on which component fails and how it affects the overall system. Since the cooling system includes multiple interconnected parts, even a single failure can influence labor time and related repairs. - Vehicle type and damage severity significantly impact cost
Larger or more complex vehicles usually require more expensive parts and longer labor times. Minor issues are relatively inexpensive, while severe overheating damage can lead to major engine repairs costing thousands. - Repair vs. replacement and part choice matter
Temporary repairs may cost less upfront but are often short-term solutions. Replacement parts vary in price depending on whether OEM or aftermarket options are used, and additional items like coolant or gaskets can increase the total bill. - Labor time and shop rates add substantially to the total
Complex repairs require more hours, increasing labor costs. Rates vary by region, shop type, and technician experience, and diagnostic fees are often charged separately. - Overheating can lead to costly secondary damage
Cooling system failures may cause blown head gaskets, warped engine components, oil contamination, or sensor failures. Early repair helps prevent cascading damage and significantly higher expenses.
FAQs:
What is the engine cooling system?
The engine cooling system is a network of components, including the radiator, water pump, thermostat, hoses, coolant fluid, cooling fans, and sensors, that work together to regulate engine temperature and prevent overheating.
What to do when the engine cooling system light comes on?
Address it promptly. A warning light may indicate overheating or a component failure, and delaying inspection can lead to more serious engine damage.
How to fix an engine cooling system?
Repair depends on the failing component. It may involve replacing parts such as hoses, the thermostat, radiator, or water pump, and addressing any related damage caused by overheating.
How do I know if my cooling system is bad?
Signs include overheating, coolant leaks, repeated temperature spikes, or related engine damage. A proper diagnosis is usually needed to identify the exact cause.
You May Also Like.
Where Does Engine Coolant Go in Your Car? Key Insights
Engine Cooling System Service | Key Maintenance Tips
Why Is My Engine Cooling System Light On? Causes & Fixes
Car Overheating but Coolant Is Full: What’s the Real Problem?
Your temperature gauge is climbing, yet the reservoir shows plenty of fluid. So why is your car overheating but coolant is full? It’s a frustrating and confusing situation that many drivers face. The answer often lies deeper than the coolant level itself, and ignoring it could mean serious engine damage. Let’s uncover what’s really going on under the hood.
Reliable cooling system services available.
TL;DR:
A car can overheat even if the coolant reservoir is full because effective cooling depends on proper circulation and heat transfer, not just fluid level. Problems with the thermostat, radiator, water pump, cooling fans, or trapped air can disrupt coolant flow and cause overheating. Identifying and fixing these component failures is essential to prevent damage.
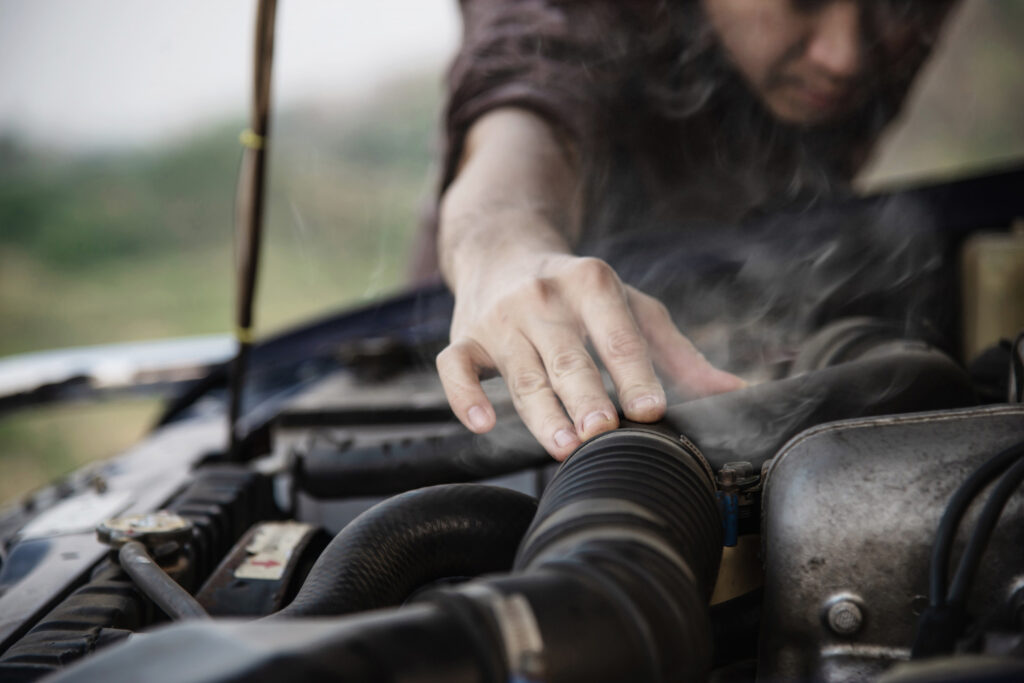
Why Is My Car Overheating With Full Coolant?
Even if the coolant reservoir appears full, your engine can still overheat. That’s because overheating is not caused solely by the amount of coolant in the system, it depends on how effectively that fluid circulates and transfers heat away from the engine.
A modern liquid-cooled internal combustion engine operates through a closed cooling circuit. In this system, a mixture of water and antifreeze absorbs heat from the motor block and travels through internal passages to the radiator, where the heat is released into the air. A water pump keeps the fluid moving, while a thermostat regulates whether coolant flows through the radiator or bypasses it based on temperature. Cooling fans help remove heat when there isn’t enough natural airflow from driving.
Nevertheless, having a full coolant level does not guarantee proper cooling performance. Components such as the thermostat, radiator, water pump, cooling fans, and even trapped air in the system must all function correctly. If any of these parts fail or don’t operate as intended, coolant may not circulate or release heat efficiently, causing the engine to overheat even though the reservoir appears full.
Check the Thermostat for Proper Opening and Closing
The thermostat is a small but essential valve in the cooling system that controls when and how much fluid flows to the radiator. When the motor is cold, the thermostat stays closed so coolant circulates only within the engine block. Once the coolant reaches a specific temperature, the thermostat opens, allowing it to pass through the radiator where heat is released.
If the thermostat sticks closed, coolant cannot reach the radiator, causing heat to remain trapped inside the engine block. This is a common reason for overheating even when the fluid level is full. On the other hand, if the thermostat sticks open, the engine may run too cool, which can reduce efficiency and lead to other performance concerns.
Possible signs of a thermostat issue include:
- A rapid temperature rise shortly after starting the engine
- Hoses that stay cold or unevenly heated
- A warm radiator while the motor continues overheating, suggesting restricted flow before the radiator
Testing usually involves checking whether the thermostat opens at the correct temperature using heat or diagnostic tools. If it does not open properly, replacement is necessary to restore proper cooling system function.
Inspect the Radiator for Blockages or Internal Damage
The radiator functions as a heat exchanger, made up of a network of tubes and fins designed to release engine heat into the surrounding air. Hot coolant flows from the motor through these internal tubes, while air passes across the external fins to remove heat before the fluid returns to the engine.
Even if the coolant level is full, the radiator may fail to cool effectively under certain conditions. Cooling performance can be reduced if:
- Internal passages are blocked by debris, rust, mineral deposits, or scale
- External fins are clogged with dirt, leaves, or insects, restricting airflow
- The radiator core is damaged or corroded, narrowing coolant flow paths
When tubes become blocked, less heat is removed from the coolant. As a result, the coolant may return to the engine still hot, contributing to overheating. In severe cases, restricted cooling can create localized hot spots, which increase the risk of motor damage.
Test the Water Pump for Proper Coolant Circulation
The water pump acts as the “heart” of the cooling system, pushing it through the engine’s internal passages and directing it toward the thermostat and radiator. If the pump is not circulating coolant properly, heat cannot be carried away from the engine, leading to rising temperatures even when coolant levels appear normal.
Several issues can affect water pump performance:
- Worn bearings or impeller deterioration, which reduce coolant flow
- Seal failure, causing internal or external leaks
- Drive belt problems, preventing the pump from spinning at the correct speed
When the water pump fails, circulation may slow down or stop completely. As a result, heat remains trapped in the engine block, causing rapid overheating. Signs of a failing pump can include unusual motor bay noises or visible leaking from behind the pump seal.
Examine the Cooling Fans and Electrical Connections
Cooling fans play a critical role when the vehicle isn’t moving fast enough for natural airflow to cool the radiator, such as in traffic or while idling. Many modern vehicles rely on electric cooling fans that are controlled by temperature sensors and relays to activate at the right time.
Several issues can prevent proper fan operation:
- A failed fan motor, causing the fan not to turn on
- A blown fuse or faulty relay, preventing power from reaching the fan
- A malfunctioning temperature sensor, which fails to signal the fan to activate
Look for Air Pockets in the Cooling System and Bleed Them Properly
A common cause of overheating—even when the coolant reservoir appears full—is air trapped inside the cooling system. These air pockets act like insulation, preventing fluid from properly contacting engine metal surfaces and reducing the system’s ability to transfer heat efficiently.
Air can enter the cooling system after improper filling during a coolant change, through leaks around hoses or seals, or when bleeder valves are missing or not functioning correctly. When air is present, it can create foam and bubbles that reduce water pump performance and contribute to localized hot spots within the motor.
Trapped air can also cause misleading temperature readings if the sensor is exposed to air instead of liquid coolant. Properly bleeding the cooling system, by running the engine and releasing trapped air through designed vents or bleeder screws, is essential after coolant service or repairs to restore proper circulation and cooling performance.
Key Takeaways.
- Overheating isn’t just about coolant level
A full reservoir does not guarantee proper cooling. Engine temperature depends on effective fluid circulation and heat transfer. If main components fail, overheating can occur despite adequate fluid levels. - The thermostat regulates proper coolant flow
It controls when coolant moves from the engine to the radiator. If stuck closed, heat becomes trapped in the motor block. If stuck open, engine efficiency may decrease. - Radiator and water pump issues disrupt heat removal
Blocked radiator passages or damaged fins reduce heat dissipation. A failing water pump slows or stops coolant circulation. Both problems allow heat to build up inside the engine. - Cooling fan or electrical failures reduce airflow
Fans are essential when the vehicle is idle or moving slowly. Faulty motors, relays, fuses, or sensors can prevent activation. Without airflow, the radiator cannot release heat effectively. - Air pockets can cause hidden overheating problems
Trapped air reduces heat transfer and may create motor hot spots. Air can enter through improper filling, leaks, or faulty bleeder valves. Proper bleeding restores circulation and accurate temperature readings.
FAQs:
How do you fix a car that overheats?
Fixing an overheating car involves identifying the root cause within the cooling system. This may include repairing or replacing a faulty thermostat, clearing radiator blockages, fixing a failing water pump, restoring cooling fan operation, or bleeding trapped air from the system.
Is it safe to drive a car that is overheating?
No. Continuing to drive while the engine is overheating can lead to serious engine damage, especially if heat is not being properly dissipated.
What is the most common cause of car overheating?
A common cause is a malfunctioning thermostat that restricts coolant flow, even when the level appears full.
What is the first thing you check when a car is overheating?
First, verify that the cooling system components are functioning properly, especially coolant circulation through the thermostat, radiator, water pump, and cooling fans.
You May Also Like:
Engine Cooling System Service: Why It’s Essential for Your Car
Why Is My Engine Cooling System Light On? Causes and Solutions
How Engine Cooling System Works to Prevent Overheating