How to Clean Car Suspension Parts? Best Methods
If you’ve ever wondered how to clean car suspension parts?, you might assume it’s as simple as rinsing off dirt. But the real challenge lies in removing hidden grime, preventing corrosion, and protecting components that most drivers never even look at. In this guide, you’ll uncover the safest and most effective cleaning methods, plus the mistakes that can quietly shorten your suspension’s lifespan.
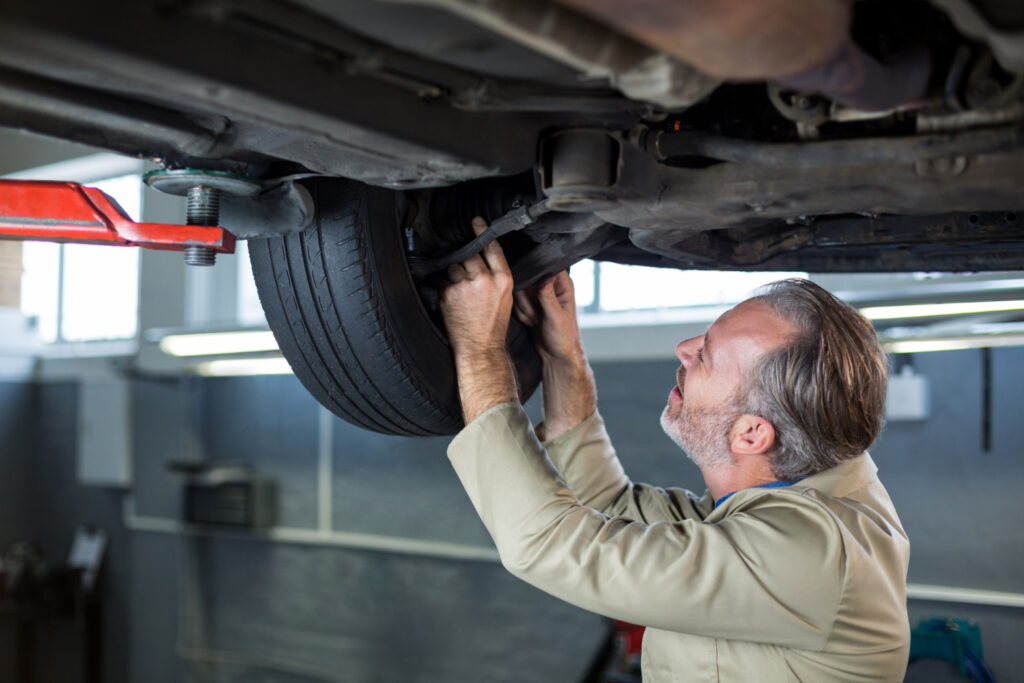
Learn more about car suspension service in Brooklyn.
TL;DR:
Cleaning car suspension parts requires careful preparation, safe lifting, and methodical cleaning to avoid damaging sensitive components. Start by setting up a stable workspace, securing the vehicle properly, and removing loose dirt before applying targeted cleaners. After brushing and rinsing each part, dry everything thoroughly and inspect for wear, leaks, or structural issues. Document any problems and avoid driving if critical components appear compromised.
Preparing the Vehicle Before Starting the Cleaning Process
Before cleaning any suspension components, proper preparation ensures safety, prevents damage, and helps you spot issues early. Begin by parking the vehicle on level ground in a well-lit, stable workspace. Avoid windy conditions if you’ll be using cleaners or sprays that could drift.
Next, gather all required tools and PPE, including jack stands, wheel chocks, brushes, rags, buckets, a torque wrench, and a hose or pressure washer if available. Wear safety glasses, nitrile gloves, and hearing protection when needed. Allow recently driven components to cool down before working, since heat can cause burns and affect how cleaning products behave.
Take precautions around electrical and sensor-based systems by isolating or covering connectors and, when appropriate, disconnecting the battery. Finally, document the starting condition with photos from multiple angles. This makes reassembly easier and provides a reference if you discover leaks, wear, or damage during the cleaning process.
Lifting and Securing the Car for Safe Access to the Suspension
Safely lifting the vehicle is essential before working on any suspension components. Always begin by identifying the correct lifting points using the service manual. These reinforced areas prevent damage to the body, mounts, or suspension if used properly.
Once the vehicle is raised with a hydraulic jack, immediately place rated jack stands under solid contact points. Never rely on the jack alone. Add wheel chocks to the wheels still on the ground to prevent the car from shifting or rolling. Only lift the vehicle as high as needed, typically removing one wheel at a time to access struts, control arms, bushings, tie rods, and brakes.
Before working underneath, perform quick stability checks by gently pushing the vehicle to confirm it is firmly seated on the stands and resting on a stable, level surface. If the car has air suspension or active height-control systems, follow manufacturer instructions to enter a safe service mode or depressurize the system, as technical service bulletins emphasize these steps to avoid damage or injury.
Removing Dirt and Debris From Suspension Components
Cleaning the suspension starts with clearing loose contaminants so you can see each part clearly and avoid grinding dirt into sensitive components. The goal is to remove buildup gradually while protecting rubber boots, seals, and connectors from damage.
Essential steps include:
- Start high and work downward: Use low-pressure compressed air or a soft brush to knock loose dirt from springs, upper mounts, and wheel wells so debris falls away from cleaned areas.
- Remove large debris by hand: Pick out leaves, mud, and stones using gloves or plastic pry tools. Avoid metal tools near rubber boots, brake lines, or wiring to prevent accidental damage.
- Use a pressure rinse carefully: A medium-pressure hose can remove packed mud and road salt, but keep the nozzle away from CV boots, bushings, shock seals, and electrical connectors. High-pressure spray can push water past seals or harm delicate components.
Applying Cleaning Products and Brushing Each Part Thoroughly
Once loose dirt is removed, focused cleaning helps expose hidden wear, leaks, and surface damage. The essential step is choosing the right products for each material and working methodically so every component is inspected as it’s cleaned.
Use the right cleaning products:
- Select brake cleaner for rotors and calipers and general-purpose automotive degreasers for metal suspension arms.
- Avoid harsh solvents on rubber or painted parts; use mild soap-and-water for boots and bushings.
- Many training guides stress matching cleaners to materials to prevent rubber or paint deterioration.
Brush each part carefully:
- Use soft-bristled brushes on rubber and painted surfaces, and nylon or brass brushes on corroded metal.
- Clean one component at a time, control arms, ball joints, strut towers, shock bodies—to ensure clear inspection as dirt lifts.
- Limit stiff-brush use on threads or delicate surfaces to avoid unnecessary abrasion.
Check seals and boots while cleaning:
- Wipe around ball-joint boots, tie-rod ends, and CV boots to identify cracks, grease seepage, or dried-out fittings.
- Cleaning makes leaks and boot failures easier to spot, which is important since early detection prevents accelerated wear.
Handle solvents safely:
- Apply brake cleaner or degreaser briefly, then rinse promptly.
- Never let solvents sit on rubber or painted components.
- Follow local rules for disposal of solvent-contaminated rags and runoff, as many areas restrict drainage of chemical waste.
Rinsing, Drying, and Inspecting the Suspension for Any Damage
After cleaning, proper rinsing and inspection ensure the suspension is free of residue and safe to operate. A gentle rinse clears remaining cleaner without forcing water into bearings or seals. Always keep the spray angled away from hub seals, shock seals, and electrical connectors to avoid moisture intrusion in sensitive areas.
Once rinsed, dry the suspension thoroughly. Use compressed air at safe pressure or clean rags to remove water trapped in crevices, spring seats, and around fasteners. Standing moisture can speed up corrosion, so focus on hidden pockets where water collects. If water-based cleaners were used, consider wiping exposed steel fasteners with a corrosion inhibitor according to product directions.
With components clean and dry, perform a systematic inspection:
- Shocks/struts: Check for oil seepage, dents, or rust on the piston tube.
- Springs: Look for broken coils, sagging, or corrosion at seats.
- Control arms & bushings: Identify torn, hardened, or deformed bushings and check arms for cracks or bends.
- Ball joints & tie rods: Look for damaged boots and test for play, as grease loss typically indicates failure.
- Brake lines & hoses: Inspect for bulges, surface wear, or corrosion at fittings.
- Fasteners: Ensure bolts and nuts remain tight and torque them to factory specifications.
Finally, document everything. Note leaks, damaged boots, worn bushings, or corrosion that needs follow-up. If any safety-critical part shows severe wear or structural damage, avoid driving the vehicle until proper repairs can be made, as emphasized in many regulatory inspection guidelines.
Key Takeaways
- Preparation is essential for safety and accuracy.
Begin by setting up a stable workspace, gathering tools and PPE, letting components cool, and documenting the suspension’s condition. These steps prevent accidents and help identify issues early. - Proper lifting ensures safe access to suspension components.
Use correct jack points, secure the vehicle with jack stands and wheel chocks, and confirm stability before working underneath. Follow special procedures for vehicles with air or active suspension systems. - Removing debris prevents damage during deeper cleaning.
Start from the top and work downward, clear large debris by hand, and use a low- to medium-pressure rinse carefully. Avoid directing strong water jets at seals, bushings, or electrical connectors to prevent contamination and damage. - Targeted cleaning reveals wear and protects sensitive parts.
Use appropriate cleaners for each material, brush components gently, and inspect critical areas like boots, seals, and joints while cleaning. Avoid harsh solvents on rubber and follow proper environmental disposal guidelines. - Thorough rinsing, drying, and inspection ensure safe operation.
Rinse gently, dry completely with air or rags, and inspect shocks, springs, bushings, joints, hoses, and fasteners. Document issues and avoid driving if any safety-critical components show significant damage or failure.
FAQs:
What can I use to clean my suspension?
Use automotive degreasers for metal parts, brake cleaner for rotors/calipers, mild soap-and-water for rubber boots, and soft or nylon brushes. Avoid harsh solvents on rubber or painted surfaces.
How do you clean car suspension?
Prepare the vehicle, lift it safely, remove loose dirt, apply the right cleaners, brush each part carefully, then rinse, dry, and inspect for damage such as leaks or worn bushings.
Is it okay to spray WD-40 on suspension?
No—WD-40 should not be used on rubber boots, bushings, seals, or painted parts because it can cause deterioration. Use appropriate cleaners instead.
How do you clean rusty suspension parts?
Use automotive degreasers and nylon or brass brushes to remove surface rust. Avoid aggressive abrasion on sensitive areas, and inspect components afterward to determine if replacement is needed.
You May Also Like:
Where Can I Find Wheel Alignment and Balancing Deals Near You?
How to Choose the Right Auto Body Shop
Mechanical Parts Repair: Finding Services for Your Car