How to Paint Car Suspension Parts for Long-Lasting Finish
Ever noticed how freshly painted suspension parts can transform the look of a car, yet many finishes start chipping within months? The secret isn’t just the paint you choose. If you’ve ever wondered how to paint car suspension parts? the right way, there’s a specific process professionals follow that most DIY guides overlook. Miss one step, and the finish won’t last.
Assistance with car suspension service in Brooklyn.
TL;DR:
To paint car suspension parts for a long-lasting finish, follow a careful process: thoroughly clean and degrease the components, sand the surface to improve adhesion, apply primer to protect the metal, and spray durable automotive paint in thin coats. Finally, allow the coating to fully cure before reinstalling the parts to ensure durability, proper protection, and a smooth, lasting finish.
Cleaning Suspension Parts to Remove Dirt and Grease
The first and most critical step when painting suspension components is cleaning suspension parts properly. These parts collect heavy contamination from road grime, grease, brake dust, and oil leaks. If these contaminants remain, they can prevent paint from bonding correctly and lead to defects such as fisheyes, peeling, or uneven coating. Automotive refinishing guidelines emphasize that surface cleanliness is essential for proper adhesion because even invisible contaminants can interfere with paint curing.
The process typically begins with washing the parts using warm water and a mild detergent to remove loose dirt. After this initial wash, a degreasing agent should be applied to dissolve oils, wax residues, and lubricants that commonly remain on suspension components. Degreasers are particularly important because oils can stay trapped in microscopic surface pores even after washing with soap alone, making grease removal a necessary step before painting.
In addition to chemical cleaning, mechanical cleaning may be needed to remove rust, old paint, and hardened debris. Tools such as wire brushes, abrasive pads, or pressure washing equipment can help clean difficult areas. Special attention should be given to crevices, joints, and mounting points where contaminants often accumulate. Once the parts are fully cleaned, they must be completely dry and wiped with lint-free cloths to ensure no residue remains on the surface.
Sanding the Surface for Better Paint Adhesion
After suspension components are properly cleaned, the next step is sanding the surface to prepare it for primer and paint. This step is essential because it removes remaining rust or old coatings while creating a slightly rough texture that improves paint adhesion. Smooth or glossy surfaces can cause coatings to slide or separate, so achieving a uniform matte texture helps ensure it bonds correctly and lasts longer.
Main steps involved in the sanding process:
- Start with medium-grit sandpaper to remove corrosion, oxidation, or flaking paint from the surface.
- Use wire brushes or abrasive discs if heavy rust is present and bare metal needs to be exposed.
- Switch to finer sandpaper after major imperfections are removed to smooth the surface and reduce deep scratches.
- Focus on creating microscopic grooves that help the primer form a strong mechanical bond with the metal.
- Pay special attention to edges, corners, and tight areas, since it often peels first in these locations if preparation is incomplete.
- Remove all sanding dust before continuing, typically using compressed air, tack cloths, or solvent wipes.
Research in automotive refinishing indicates that inadequate surface preparation is a common cause of coating failure, which makes proper sanding an important step for durable adhesion.
Applying Primer to Protect Metal Components
Once the surface preparation is complete, the next step is applying primer to create a protective and adhesive base for the paint. Primer works as an intermediate layer between bare metal and the final coating. Its main purpose is to improve adhesion, seal the surface, and help protect metal components from corrosion.
Suspension parts are especially vulnerable to rust because they are constantly exposed to moisture, road salt, and debris, making the use of a high-quality automotive primer important for durability.
Considerations when applying primer:
- Primer creates a bonding layer that helps the paint adhere more effectively to the metal surface.
- It also helps seal the surface and cover small imperfections that remain after sanding.
- Certain types, such as epoxy or rust-inhibiting primers, are often recommended for metal components because they provide increased corrosion resistance.
- Apply the primer in thin, even coats rather than one heavy layer to avoid uneven surfaces or adhesion problems.
- Allow each coat to flash or partially dry before applying the next layer to support proper curing and reduce the risk of runs or sagging.
After the primer has fully dried, light sanding may be performed to smooth out minor imperfections and prepare the surface for the final coat. This step helps create a more uniform finish and supports long-term adhesion of the paint layer.
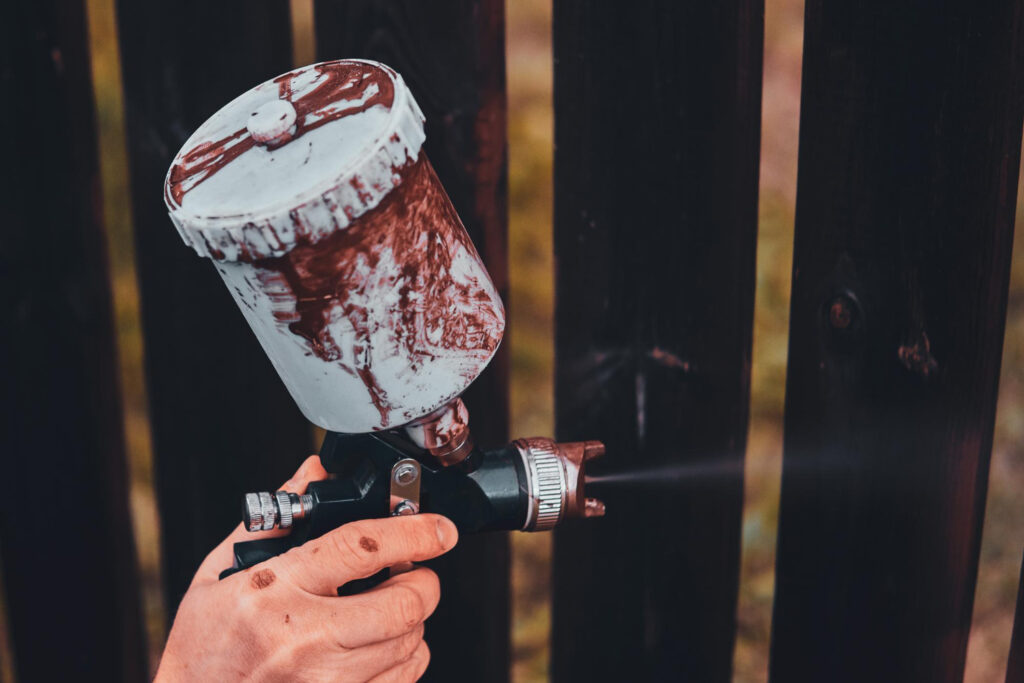
Spraying Even Coats of Durable Automotive Paint
After the primed surface is prepared, the next step is spraying durable automotive paint onto the suspension components. The paint used must be strong enough to withstand impacts from debris, moisture exposure, and constant mechanical stress. Because of these conditions, specialized automotive paints or chassis coatings are often used since they provide improved resistance to corrosion, abrasion, and chemicals.
To achieve a uniform finish, it is typically applied using spray equipment or aerosol automotive coatings. Instead of applying one heavy layer, the paint should be sprayed in several thin coats. This approach improves adhesion and helps prevent issues such as drips, uneven coverage, or trapped solvents within the coating.
Each coat should be allowed to partially dry before the next layer is applied. During this stage, maintaining a steady spraying distance and using controlled, overlapping passes helps ensure it covers the surface evenly. Some refinishing processes may also include a clear protective topcoat, which increases resistance to scratches, ultraviolet light, and environmental exposure.
Allowing Proper Drying and Reinstalling the Parts
The final step in painting suspension components is allowing it to cure completely before reinstalling the parts on the vehicle. Curing is the chemical process through which the paint hardens and reaches its full durability. If the parts are reinstalled too soon, the coating may still be soft and vulnerable to scratches, fingerprints, or mechanical damage. Depending on the type of paint and environmental conditions, curing may take several hours or more than a full day. Automotive coatings typically cure best with adequate ventilation, moderate temperatures, and low humidity, so following recommended drying time guidelines is important.
Once it has fully cured, the suspension components can be carefully reinstalled on the vehicle. During reassembly, proper alignment and secure fastening of all mounting points should be verified to ensure the suspension system functions correctly. When the entire process is completed properly, the final finish can provide improved appearance and long-lasting protection against corrosion and wear.
Key Takeaways.
- Proper preparation is essential for a long-lasting finish.
Painting suspension parts requires a specific step-by-step process.
Skipping preparation stages can cause the finish to chip, peel, or fail quickly. - Thorough cleaning ensures proper paint adhesion.
Suspension components accumulate grime, grease, brake dust, and oil.
Washing, degreasing, and removing debris prevent contaminants from interfering with paint bonding. - Sanding creates the right surface for primer and paint.
Sanding removes rust and old coatings while forming a uniform matte texture.
This rough surface helps primer and paint bond securely to the metal. - Primer and paint must be applied in controlled layers.
Primer improves adhesion, seals the surface, and protects metal from corrosion.
Durable automotive paint should be sprayed in several thin coats for even coverage and better durability. - Proper curing and careful reinstallation complete the process.
Paint must fully cure before reinstalling suspension parts to avoid damage.
Correct reassembly ensures both long-lasting protection and proper suspension performance.
FAQs:
How to paint suspension parts?
To paint suspension parts, first clean and degrease them thoroughly to remove dirt and oils. Next, sand the surface to create a rough texture for better adhesion, apply primer, and spray durable automotive paint in several thin coats. Allow it to fully cure before reinstalling the parts.
Can I paint my suspension parts?
Yes, suspension parts can be painted if they are properly prepared. Cleaning, sanding, priming, and applying durable automotive paint are essential steps to ensure the coating adheres well and provides long-lasting protection.
What to spray on suspension parts?
Specialized automotive paint or chassis coatings are typically used on suspension parts. These coatings are designed to resist corrosion, abrasion, moisture, and chemicals while providing a durable protective finish.
Will paint peel off of plastic?
It can peel off plastic surfaces if they are not properly prepared. Proper surface preparation and the use of appropriate primer and coatings help improve adhesion and reduce the risk of peeling.
You May Also Like:
How to Clean Car Suspension Parts? Best Methods
What Happens if I Don’t Align and Balance My Wheels?
How Long Does a Collision Repair Take?
Reviewed by Carlos Jimenez – Mechanic